

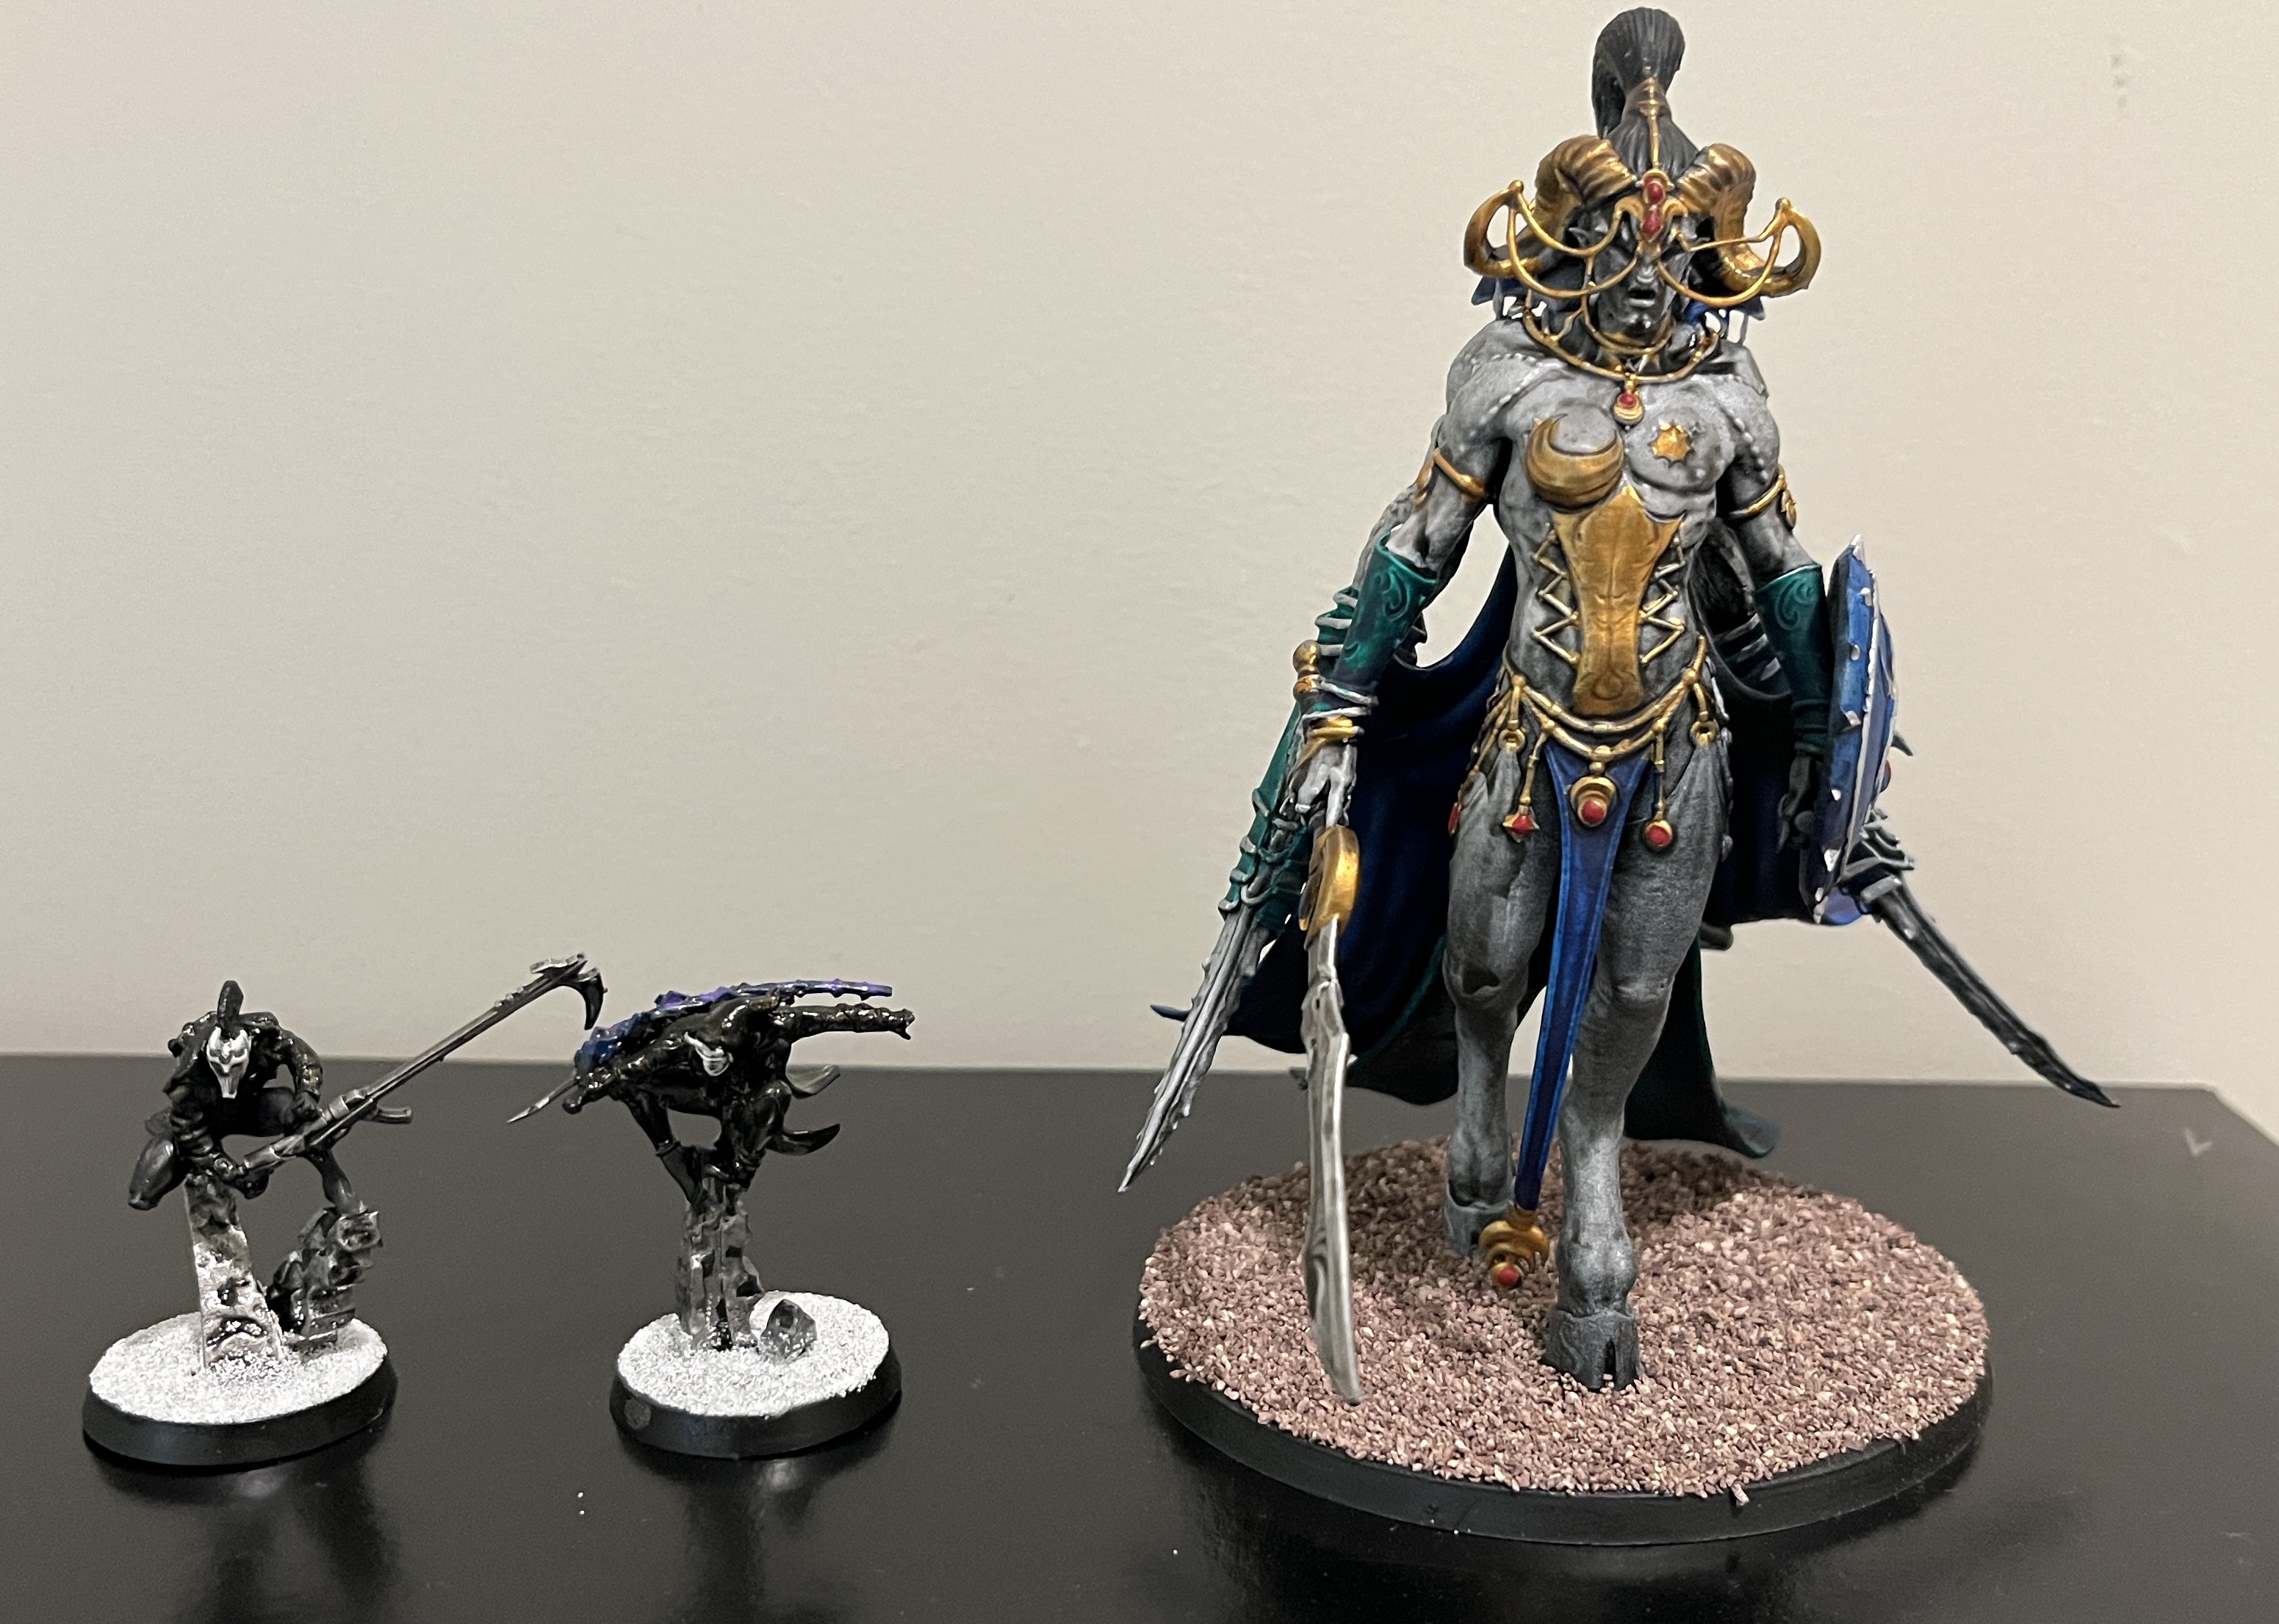
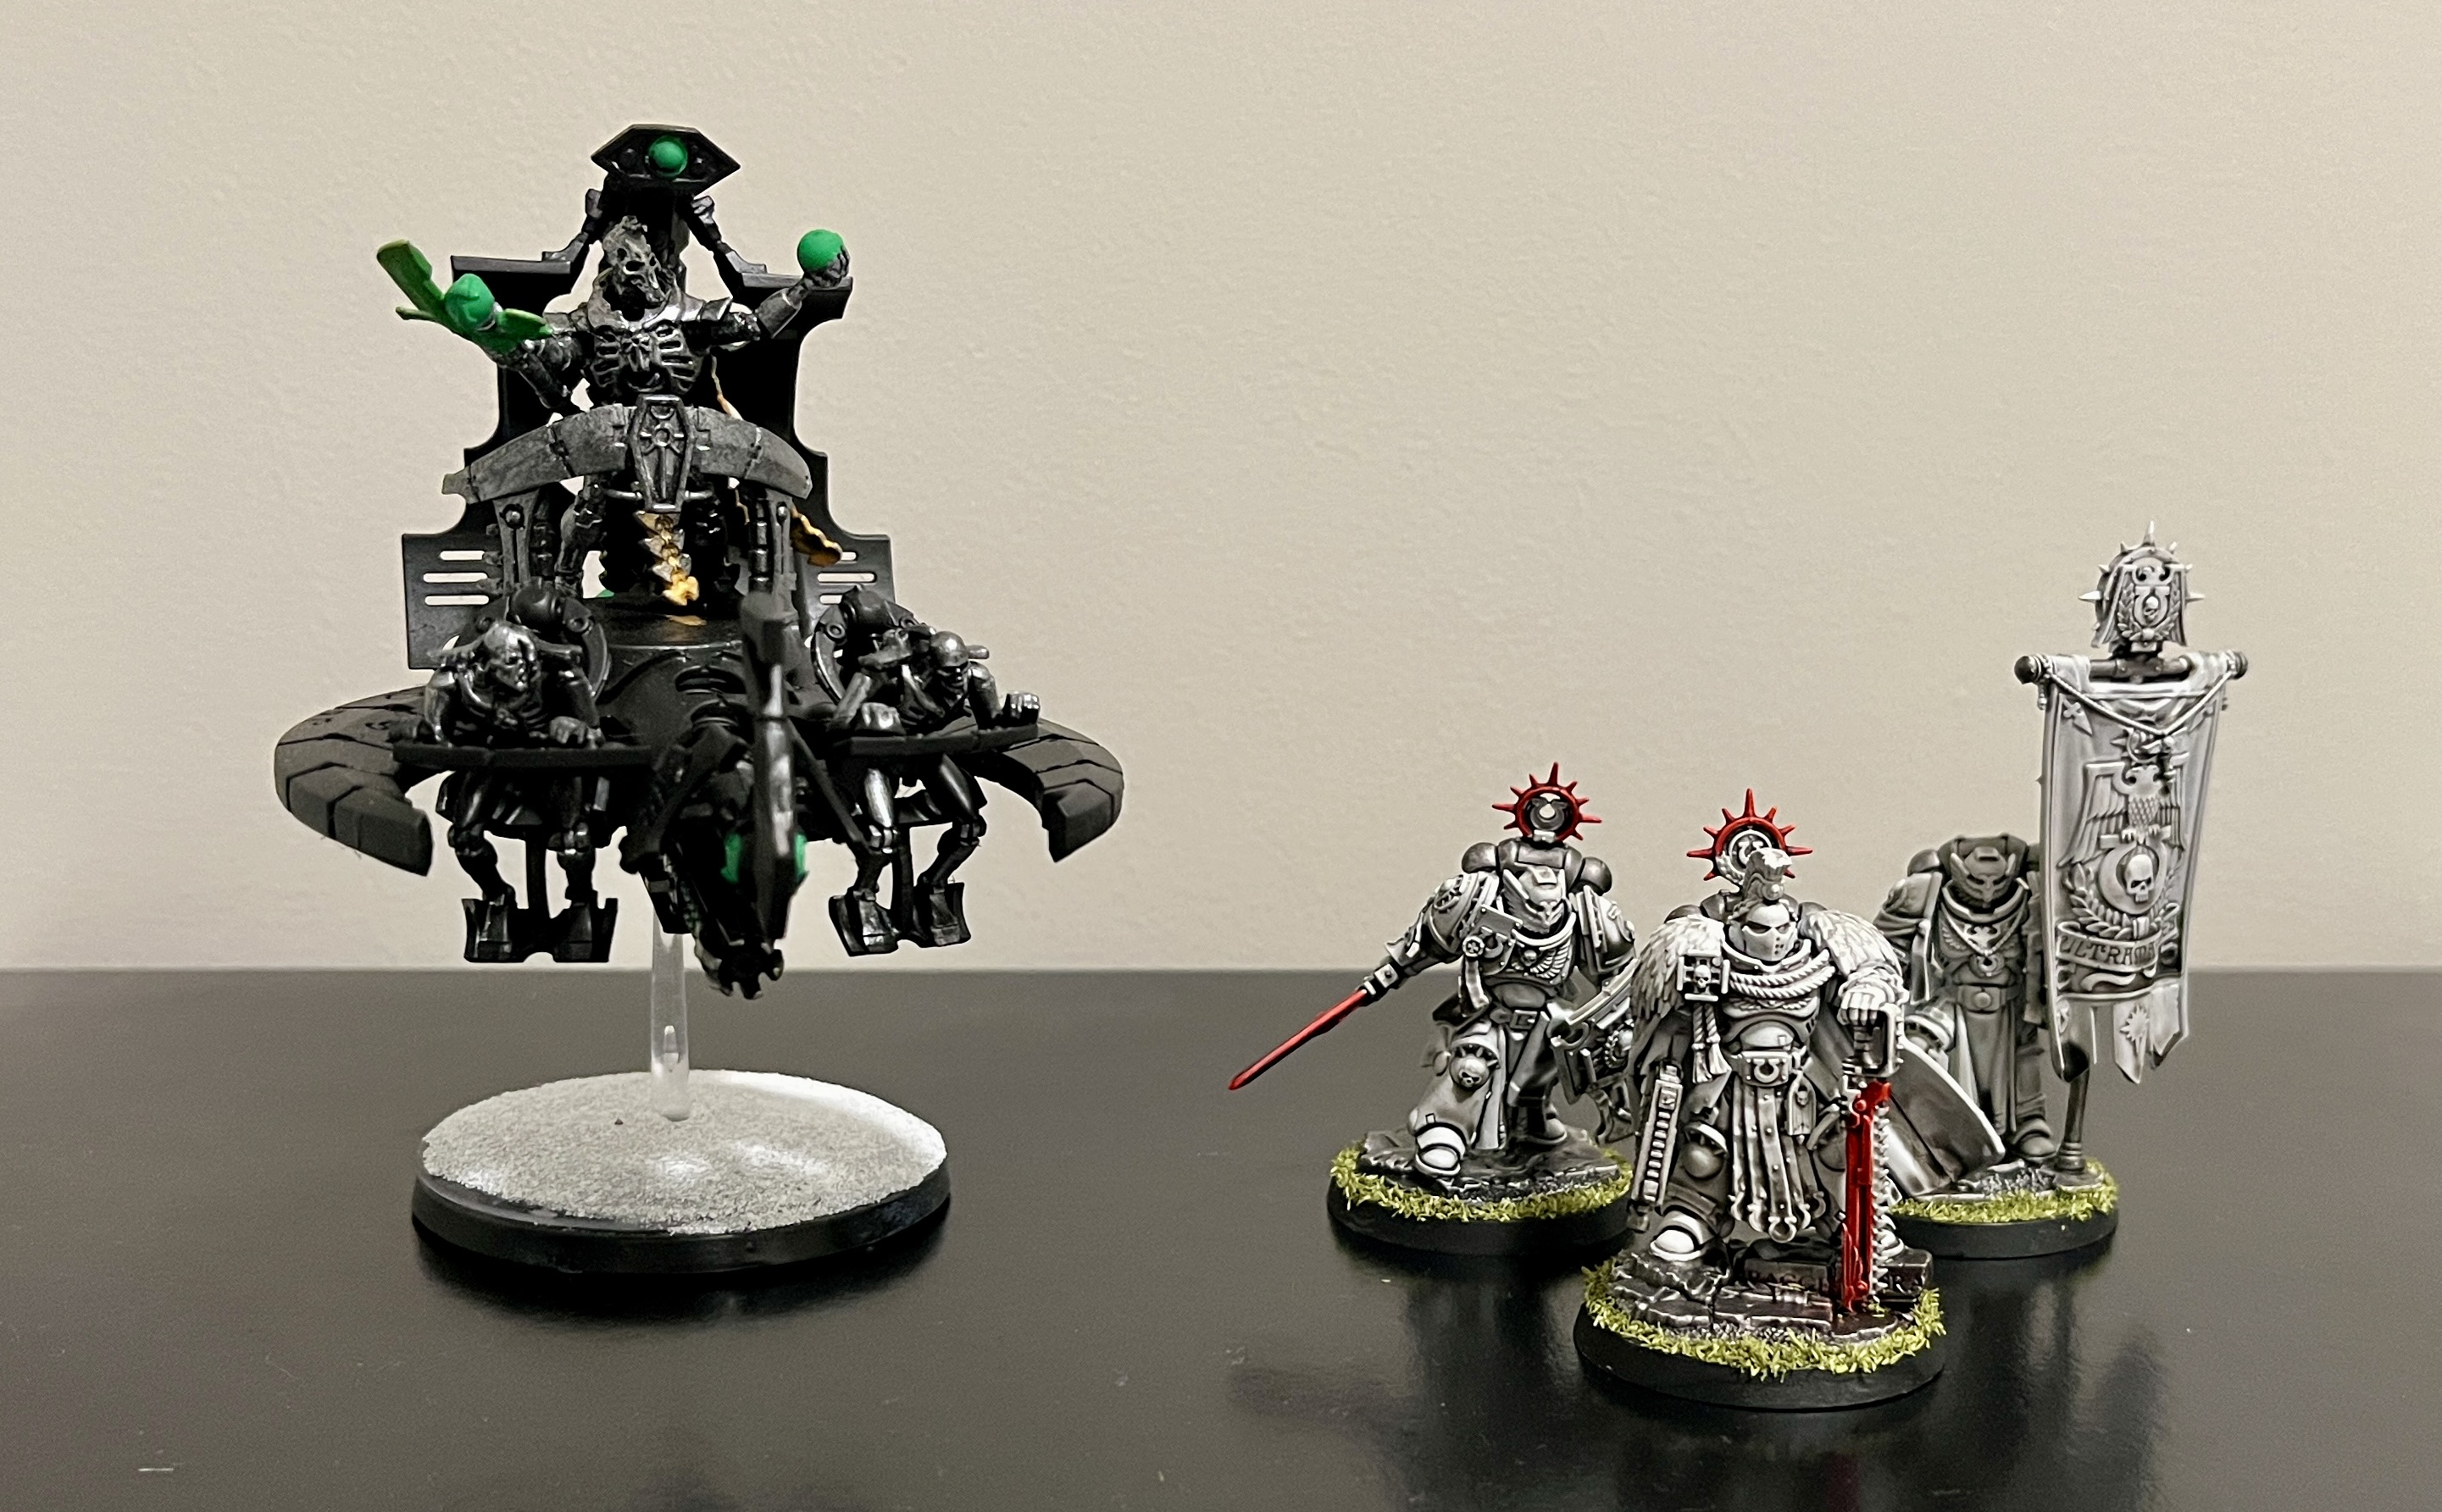
This week’s Grown Men Playing With Toys’ Battle Report features the Chaos Daemons Legion of Excess and Warptide against the Harlequins Armoured Warhost and Serpent’s Brood. As backdrop for the game….
The Legion of Excess doesn’t invade so much as it infects. Every world it touches becomes a stage for Slaanesh’s endless appetite and every mortal who resists becomes another voice added to the chorus of screaming souls that She Who Thirsts endlessly devours. There is no subtlety to this army, no patience…..only hunger, dressed up in intoxicating colors and needle-fanged smiles, surging forward because stopping would mean the feast ends.
If the Legion of Excess is Slaanesh’s appetite made manifest, the Harlequins are the joke Slaanesh never gets to hear the end of. The Harlequins exist as a rebuke to everything Slaanesh represents. They are discipline instead of indulgence, purpose instead of excess, a performance instead of a feeding. They do not fight Slaanesh’s daemons out of duty. They fight because someone has to keep telling the joke correctly and Slaanesh has never once gotten the punchline right.
There are few rivalries in the 41st millennium as old, or as personal, as this one. Slaanesh’s appetite is the very thing the Harlequins were born to mock and there’s no daemon on the tabletop more purpose-built to remind them why they fight than a Slaanesh Daemon bearing down at full speed. This isn’t just two lists colliding, it’s the argument the Aeldari and the Dark Prince have been having since before either army’s models were sculpted, played out one more time across the table.
They said we’re too old, but we said “hold our dice”…..as we find out whether the oldest wound in the Aeldari psyche can still be answered with a blade and a grin…..
JUMP TO:
Harlequins Specific Strategies
Chaos Daemons Specific Strategies
RULES / POINTS VERSION:
11th Edition, 2026-2027 Chapter Approved
August 2026 Balance and MFM Update
MATCHUP:
| Faction: | Detachment: | Force Disposition: |
| Harlequins | Armoured Warhost and Serpent’s Brood | Reconnaissance |
| VS | ||
| Faction: | Detachment: | Force Disposition: |
| Chaos Daemons | Legion of Excess and Warptide | Priority Assets |
MISSION:
| Category | Description |
| Chaos Daemons Primary | Vanguard Operation |
| Harlequins Primary | Search and Scour |
| Terrain Layout | Layout A |
| Deployed First | Chaos Daemons |
| First Turn | Harlequins |
| Chaos Daemons Secondaries | Tactical |
| Harlequins Secondaries | Tactical |
LISTS:
Harlequins:
List
Aeldari
Armoured Warhost and Serpent’s Brood (3 Detachment Points)
Reconnaissance
Strike Force (2,000 Points)
ATTACHED UNITS
Attached unit 1
Troupe Master (95 Points)
• Attached as: Leader (Character)
• Warlord
• 1x Flip Belt
• 1x Fusion pistol
• 1x Troupe Master’s blade
• Enhancements: Weavers’ Wail
Troupe (205 Points)
• Attached as: Bodyguard
• 1x Lead Player
◦ 1x Flip Belt
◦ 1x Fusion pistol
◦ 1x Power sword
• 11x Player
◦ 11x Flip Belt
◦ 3x Fusion pistol
◦ 11x Harlequin’s special weapon
◦ 4x Neuro disruptor
◦ 4x Shuriken pistol
Attached unit 2
Troupe Master (95 Points)
• Attached as: Leader (Character)
• 1x Flip Belt
• 1x Fusion pistol
• 1x Troupe Master’s blade
• Enhancements: Key of Ghosts
Troupe (85 Points)
• Attached as: Bodyguard
• 1x Lead Player
◦ 1x Flip Belt
◦ 1x Fusion pistol
◦ 1x Power sword
• 4x Player
◦ 4x Flip Belt
◦ 1x Fusion pistol
◦ 4x Harlequin’s special weapon
◦ 2x Neuro disruptor
◦ 1x Shuriken pistol
Attached unit 3
Troupe Master (75 Points)
• Attached as: Leader (Character)
• 1x Flip Belt
• 1x Fusion pistol
• 1x Troupe Master’s blade
Troupe (85 Points)
• Attached as: Bodyguard
• 1x Lead Player
◦ 1x Flip Belt
◦ 1x Fusion pistol
◦ 1x Power sword
• 4x Player
◦ 4x Flip Belt
◦ 1x Fusion pistol
◦ 4x Harlequin’s special weapon
◦ 2x Neuro disruptor
◦ 1x Shuriken pistol
CHARACTERS
Death Jester (80 Points)
• 1x Flip Belt
• 1x Jester’s blade
• 1x Shrieker cannon
• Enhancements: Fanged Leer
Solitaire (115 Points)
• 1x Flip Belt
• 1x Solitaire weapons
BATTLELINE
Troupe (100 Points)
• 1x Lead Player
◦ 1x Flip Belt
◦ 1x Fusion pistol
◦ 1x Power sword
• 5x Player
◦ 5x Flip Belt
◦ 1x Fusion pistol
◦ 5x Harlequin’s special weapon
◦ 2x Neuro disruptor
◦ 2x Shuriken pistol
Troupe (100 Points)
• 1x Lead Player
◦ 1x Flip Belt
◦ 1x Fusion pistol
◦ 1x Power sword
• 5x Player
◦ 5x Flip Belt
◦ 1x Fusion pistol
◦ 5x Harlequin’s special weapon
◦ 2x Neuro disruptor
◦ 2x Shuriken pistol
Troupe (100 Points)
• 1x Lead Player
◦ 1x Flip Belt
◦ 1x Fusion pistol
◦ 1x Power sword
• 5x Player
◦ 5x Flip Belt
◦ 1x Fusion pistol
◦ 5x Harlequin’s special weapon
◦ 2x Neuro disruptor
◦ 2x Shuriken pistol
DEDICATED TRANSPORTS
Starweaver (70 Points)
• 1x Close combat weapon
• 2x Shuriken cannon
Starweaver (70 Points)
• 1x Close combat weapon
• 2x Shuriken cannon
Starweaver (70 Points)
• 1x Close combat weapon
• 2x Shuriken cannon
Starweaver (80 Points)
• 1x Close combat weapon
• 2x Shuriken cannon
OTHER DATASHEETS
Skyweavers (190 Points)
• 4x Skyweaver
◦ 4x Close combat weapon
◦ 4x Skyweaver haywire cannon
◦ 4x Zephyrglaive
Skyweavers (190 Points)
• 4x Skyweaver
◦ 4x Close combat weapon
◦ 4x Skyweaver haywire cannon
◦ 4x Zephyrglaive
Skyweavers (190 Points)
• 4x Skyweaver
◦ 4x Close combat weapon
◦ 4x Skyweaver haywire cannon
◦ 4x Zephyrglaive
Exported with App Version: v2.6.0 (3), Data Version: v946

Chaos Daemons:
List
Chaos Daemons
Legion of Excess and Warptide (3 Detachment Points)
Priority Assets
Strike Force (2,000 Points)
CHARACTERS
Keeper of Secrets (265 Points)
• Warlord
• 1x Phantasmagoria
• 1x Shining Aegis
• 1x Snapping claws
• 1x Witstealer sword
Keeper of Secrets (275 Points)
• 1x Phantasmagoria
• 1x Shining Aegis
• 1x Snapping claws
• 1x Witstealer sword
• Enhancements: Soul Glutton
The Masque of Slaanesh (95 Points)
• 1x Serrated claws
Tormentbringer (165 Points)
• 1x Lashes of torment
• 1x Seeker tongues
• 1x Slashing claws
• Enhancements: False Majesty (Aura)
BATTLELINE
Daemonettes (115 Points)
• Enhancements: Bane-forged Weapons (Upgrade)
• 1x Alluress
◦ 1x Slashing claws
• 9x Daemonette
◦ 1x Daemonic Icon
◦ 1x Instrument of Chaos
◦ 9x Slashing claws
Daemonettes (115 Points)
• Enhancements: Bane-forged Weapons (Upgrade)
• 1x Alluress
◦ 1x Slashing claws
• 9x Daemonette
◦ 1x Daemonic Icon
◦ 1x Instrument of Chaos
◦ 9x Slashing claws
Daemonettes (115 Points)
• Enhancements: Bane-forged Weapons (Upgrade)
• 1x Alluress
◦ 1x Slashing claws
• 9x Daemonette
◦ 1x Daemonic Icon
◦ 1x Instrument of Chaos
◦ 9x Slashing claws
Daemonettes (100 Points)
• 1x Alluress
◦ 1x Slashing claws
• 9x Daemonette
◦ 1x Daemonic Icon
◦ 1x Instrument of Chaos
◦ 9x Slashing claws
Daemonettes (100 Points)
• 1x Alluress
◦ 1x Slashing claws
• 9x Daemonette
◦ 1x Daemonic Icon
◦ 1x Instrument of Chaos
◦ 9x Slashing claws
Daemonettes (100 Points)
• 1x Alluress
◦ 1x Slashing claws
• 9x Daemonette
◦ 1x Daemonic Icon
◦ 1x Instrument of Chaos
◦ 9x Slashing claws
OTHER DATASHEETS
Fiends (190 Points)
• 1x Blissbringer
◦ 1x Barbed tail and dissecting claws
• 5x Fiend
◦ 5x Barbed tail and dissecting claws
Fiends (190 Points)
• 1x Blissbringer
◦ 1x Barbed tail and dissecting claws
• 5x Fiend
◦ 5x Barbed tail and dissecting claws
Seekers (85 Points)
• 1x Heartseeker
◦ 1x Lashing tongue
◦ 1x Slashing claws
• 4x Seeker
◦ 1x Daemonic Icon
◦ 1x Instrument of Chaos
◦ 4x Lashing tongue
◦ 4x Slashing claws
Seekers (85 Points)
• 1x Heartseeker
◦ 1x Lashing tongue
◦ 1x Slashing claws
• 4x Seeker
◦ 1x Daemonic Icon
◦ 1x Instrument of Chaos
◦ 4x Lashing tongue
◦ 4x Slashing claws
Exported with App Version: v2.6.0 (3), Data Version: v946
IMAGE REDACTED
FACTION SPECIFIC STRATEGIES:
Harlequins:
Harlequins Serpent’s Brood makes its return to the table, this time paired with Armoured Warhost instead of a solo detachment build like I played it in 10th Edition. The reason for the pairing is to give the list access to Reconnaissance instead of Purge the Foe. It’s a proven list I’ve had a blast with before, now brought out specifically as the “known quantity” side of tonight’s pairing so I can focus my attention on learning a brand new Chaos Daemons list across the table.
The list is built around speed, movement tricks, and plenty of minimum sized units that can score actions whenever needed. Its built to be fast and bully vehicle heavy lists with the Skyweaver squadrons that carry Haywire Cannons, while six units of Troupes (three attached to Troupe Masters, three standalone Battleline) want to be constantly charging out of Starweavers, killing something in melee, and then diving back inside for protection before anything can punish them. There’s no single knockout blow here as the plan is to keep probing and knifing the opponent while using movement tricks to rack up points a plenty to create a high points floor for the pilot.
The list supports this strategy from a micro strategy perspective by containing the following units.
– Objective Holders: Battleline Troupes, Starweavers, Lone Operative Solitaire or Death Jester
– Damage Dealers: Skyweavers (anti-vehicle via Haywire), attached Troupe Master + Troupe
– Buff Pieces: Troupe Masters, Starweavers (for Sustained Hits when the Troupe disembark), the detachment rule
– Scoring Pieces: Starweavers, Solitaire, Troupe
The list wins by never giving the opponent a stationary target. Troupes disembark, do their damage, and re-embark the same turn. Skyweavers strike and reposition. Even the Solitaire and Death Jester exist to punch above their points and then get out of the way. The idea for the list is to win through constant movement and controlled aggression. The list wants to be constantly probing with Skyweavers and a Troupe or two while keeping the bulk of the army safely inside Starweavers. As the game develops, the plan is to prey on the enemies scoring units as a way of reducing their scoring options while also using the ridiculous mobility of the Harlequins to score. This should fit well with the demands of the Reconnaissance Force Disposition.
Win Condition: Generically: Harlequins Serpent’s Brood wins by refusing to give the opponent a clean target. It is always on the move and seeks to avoid or deflect an enemy’s “knockout punch”. It uses Starweavers and Rapid Embarkation to protect its melee pieces between activations and leans on sheer mobility to control which objectives are even contestable at any given moment. As long as nothing gets caught standing still, the list can score with almost anyone on movement tricks and minimum-sized scoring units alone.
Specific to this matchup: This matchup is a tough one because the Chaos Daemons don’t have any vehicles for the Skyweavers to prey on and because their combination of units and detachments give them almost the same amount of speed as the Harlequins. This makes the Chaos Daemons a real theat to just rush the Harlequins and bury them in pressure. To counter this, the Harlequins have to out-maneuver the Daemons. The win condition is all about denying the Daemons clean charges, picking off their scoring pieces (Daemonettes, Seekers) before they can lock down objectives, and using Reconnaissance’s mobility demands to simply be somewhere else when the Legion’s melee threats arrive.
Specific to this Mission (Search and Scour): Search and Scour rewards board control and denial rather than raw aggression as it awards 3VP a turn for holding Central Objectives, 2VP for destroying enemy units that started the turn inside a terrain area, 4VP per Objective from Round 2 onward, and a closing 5VP if no enemy units are wholly within the Harlequins’ own territory at the end of the battle. This lines up well with how the list already wants to play via constant repositioning to hold central ground, picking off exposed Daemons units caught in terrain, and using superior mobility to make sure nothing Daemonic is still camped in the Harlequins deployment zone come Round 5. My biggest worry is that this mission will make the Harlequins very predictable as it is telling them to hold Objectives. That plays into the hands of a Daemons army that wants to run right through the Harlequins. Also, the Harlequins don’t have an answer if the Daemons just rush a Keeper down the middle of the board. It’s not a perfect fit for the list and could be an uphill battle for the Harlequins in this matchup.
What I Want to Work On This Game: I want to work on playing around the Keepers of Secrets. On paper, the Harlequins have no answer to these two units. Rather than trying to fight them in what seems like an uphill battle, they need to focus on what they can kill and target those units. That should also align with their Win Condition of picking off scoring units and avoiding the “big engagements”.
| Category | Description |
| Leader / Bodyguard Combos: | Troupe Master with Troupe 1 (with Key of Ghosts and min sized Troupe) |
| Troupe Master with Troupe 2 (with min sized Troupe) | |
| Troupe Master with Troupe 3 (Warlord, with Weavers’ Wail and max sized Troupe) | |
| Transport / Infantry Combos: | Troupe Master + Troupe 1 in Starweaver 1 |
| Troupe 4 in Starweaver 2 | |
| Troupe 5 in Starweaver 3 | |
| Troupe Master + Troupe 2 in Starweaver 4 | |
| Strategic Reserves: | Troupe 6 |
| Key Stratagems: | Weaving Stride: WHEN: Your opponent’s Movement phase, just after an enemy unit ends a Normal, Advance or Fall Back move. TARGET: One HARLEQUINS INFANTRY unit from your army that is within 8″ of that enemy unit. EFFECT: Your unit can make a Normal move of up to 6″. |
| Striking Stride: WHEN: Your Charge phase. TARGET: One HARLEQUINS unit from your army. EFFECT: Until the end of the phase, your unit is eligible to declare a charge in a turn in which it Advanced. | |
| Skyward Lunge: WHEN: End of your opponent’s Fight phase. TARGET: One HARLEQUINS VEHICLE or HARLEQUINS MOUNTED unit from your army. EFFECT: If your unit is not within Engagement Range of one or more enemy units, you can remove it from the battlefield and place it into Strategic Reserves. | |
| Weaver’s Coils: WHEN: End of your Fight phase. TARGET: One HARLEQUINS MOUNTED unit from your army that was eligible to fight this phase. EFFECT: If your unit is not within Engagement Range of one or more enemy units, it can make a Normal move. Otherwise, your unit can make a Fall Back move of up to 6″. | |
| Key Combos: | Skyweavers + Battle Focus army rule + Boons of the Brood detachment rule + Skyward Lunge stratagem Given that all of the Skyweavers come armed with Haywire Cannons, this gives you a unit that can move up to 16 inches, blow up a Vehicle with 8 ranged shots that do Anti-Vehicle 4+ Devastating Wounds at Damage 3 each that can then go up into Reserves if not killed the next turn. |
| Troupe + Starweaver + Boons of the Brood detachment rule + Rapid Embarkation ability This is the combo that the list is built around. The goal is to disembark from a Starweaver with the Troupe, charge something with Sustained Hits, kill it, and then jump back inside the Starweaver for protection. It will take some setting up, but that’s part of the fun. Bonus if you also use the Fangs of the Brood stratagem to buff up the Troupe to ensure that you can kill your target and get back into the Starweaver. | |
| Skyweavers + Boons of the Brood detachment rule + Weaver’s Coils stratagem Skyweavers already hit hard in melee thanks to Boons of the Brood’s Sustained Hits 1 and their Acrobatic Grace ability (Stealth, -1 to hit in melee) makes them annoying to pin down even before they act. Weaver’s Coils lets them cap off a Fight phase by falling back out of Engagement Range up to 6 inches or, if they killed the unit they aren’t in Engagement Range, make a Normal Move of up to 14 inches. This allows them to strike and then vanish before the Daemons get a chance to retaliate. |
Chaos Daemons:
This is my first game with Chaos Daemons Legion of Excess and Warptide. It also will be my first time fielding my newly painted Slaanesh daemons (that probably jinxed the list with the “new model syndrome” curse to lose horribly). The detachment took a hit in the most recent balance update, so it may not be running at full strength, but I’m still excited to get it on the table. Up to this point, my only real Daemons experience has been Be’lakor and Shadow Legion mixed with a heavy dose of Chaos Space Marines, so this is my first game with a pure Daemons list and I’m looking forward to trying it out.
Playstyle-wise, this almost looks like an old-school Emperor’s Children Carnival of Excess list as it is heavy on speed and precise positioning so units buff each other into a coordinated strike, rather than just throwing bodies forward. It also borrows a bit from Coterie of the Conceited in that it demands knowing your opponent’s capabilities ahead of time so you can “call your shot” and actually get full value out of the detachment rule. Based on this, the macro strategy is to play this as a melee pressure army that is capable of tempoing the opponent through a patient trading game or going all-in with a big Turn 2 rush if the moment calls for it. The tricky parts will be picking the right targets to charge, knowing when to gambit versus when to play it safe, and figuring out which stratagems to use at what time as every option looks great on paper, but the CP economy looks like it’s going to be razor thin.
The list supports this strategy from a micro strategy perspective by containing the following units.
– Objective Holders: Daemonettes, Keepers of Secrets
– Damage Dealers: Fiends, Daemonettes, Keepers of Secrets
– Buff Pieces: Tormentbringer, The Masque of Slaanesh, detachment stratagems
– Scoring Pieces: Seekers, Daemonettes, The Masque of Slaanesh
Daemonettes doing triple duty across Objective Holding, Damage Dealing, and Scoring sums up why this list is dangerous. There’s very little dead weight and almost every unit can flex into whatever role the moment demands. That can be great if played skillfully…..or punishing if not. The idea is to use the armies speed and ability to abuse Hidden to force the opponent to come out and play. It’s a list that is very happy to have a few cheap units doing actions and scoring points while the rest of the army comes and kills you in your deployment zone. This should align nicely with the Priority Assets Force Disposition, which rewards a mix of Objective holding, performing actions, and killing the enemy.
Win Condition: Generically: Chaos Daemons Legion of Excess and Warptide wins by controlling the pace of the fight rather than reacting to it. It uses speed and Hidden to dictate when and where engagements happen, backs that up with detachment rules and stratagems that reward careful sequencing, and leans on cheap scoring pieces to keep the primary ticking over while the rest of the army closes in for the kill. Played well, it never lets the opponent set the terms and does a surprising amount of damage thanks to the detachment buffs that it can access.
Specific to this matchup: Against a Harlequins list built entirely around denying clean charges and refusing to sit still, the Daemons can’t afford to overcommit into empty space. The Harlequins will use Starweavers, Rapid Embarkation, and mobility tricks to avoid exactly the kind of “come out and play” pressure this list wants to apply, so the win condition here shifts to picking the right moment to “GO!”. The Harlequins will want to bounce around the board and turn the game into a mostly passive game of minor trading and lots of actions. To combat this, the Daemons will need to take the fight to them and pin them down. Once they get them pinned, the Daemons should then be charging and engaging Starweavers in pairs, 1 unit to kill the Starweaver and another to kill the Troupe inside. The Harlequins don’t have the profiles to survive an “all in” approach and the Daemons need to look for an opportunity to exploit that weakness.
Specific to this Mission (Vanguard Operation): Vanguard Operation rewards aggression. 4VP a turn for performing the vanguard operation action inside the opponent’s territory, plus 2VP for destroying enemy units, and then 10VP for controlling the opponent’s Home Objective at the end of the battle all tell you to push everything FORWARD. This plays directly into the list’s strengths as it has cheap scoring pieces like Seekers and The Masque that can peel off to perform the action deep in Harlequins territory while the rest of the army attacks and destroys the enemy. The 10VP Home Objective is also big as the Daemons will want to run over and through the Harlequins on their way to capturing their Home Objective. This mission looks like a good fit for the army.
What I Want to Work On This Game: Mostly I want to get a feel for playing this list. Expecting a high level of performance on a list that looks as skill intensive as this one on my first try is not reasonable, especially since it will be going against a list that I know very well.
| Category | Description |
| Strategic Reserves: | Daemonettes 5 |
| Daemonettes 6 | |
| Key Stratagems: | Archagonists WHEN: Fight phase. TARGET: One LEGIONES DAEMONICA SLAANESH MONSTER unit or up to two LEGIONES DAEMONICA SLAANESH units (excluding MONSTERS) from your army that have not been selected to fight this phase. EFFECT: Until the end of the phase, each time a model in one of those units makes an attack, add 1 to the Wound roll. |
| Thieves of Pain WHEN: Any phase, when an enemy unit targets a friendly LEGIONES DAEMONICA SLAANESH unit (excluding MONSTER/VEHICLE units), or when a friendly LEGIONES DAEMONICA SLAANESH unit (excluding MONSTER/VEHICLE units) suffers a mortal wound. TARGET: That LEGIONES DAEMONICA SLAANESH unit. EFFECT: Select one other friendly LEGIONES DAEMONICA SLAANESH unit that is within 9″ of and visible to your unit. Until the end of the phase, while the selected unit is on the battlefield, each time a model in your unit would lose a wound, inflict 1 mortal wound on the selected unit instead. | |
| Phantasmal Longing WHEN: Your Movement phase or your Charge phase. TARGET: One LEGIONES DAEMONICA SLAANESH unit from your army. EFFECT: Until the end of the phase, each time a model in your unit makes a move, it can move through terrain features. | |
| Cavalcade of Blades WHEN: Your Charge phase, just after a LEGIONES DAEMONICA SLAANESH unit from your army ends a Charge move. TARGET: That LEGIONES DAEMONICA SLAANESH unit. EFFECT: Select one enemy unit within Engagement Range of your unit, then roll one D6 for each model in your unit that is within Engagement Range of that enemy unit, or roll six D6 instead if your unit is a MONSTER unit: for each 4+, that enemy unit suffers 1 mortal wound. | |
| Daemonic Infestation WHEN: Your Command phase. TARGET: One friendly LEGIONES DAEMONICA BATTLELINE unit (excluding PINK HORRORS units). EFFECT: Your unit heals 3 wounds. | |
| Key Combos: | Keeper of Secrets + Tormentbringer + The Masque of Slaanesh + Seductive Gambit detachment rule + False Majesty (Aura) enhancement + Tormentbringer (Aura) ability + The Eternal Dance ability + Archagonists stratagem Executing this combo is the dream for every player that pilots this list. In an ideal world, you line up a massive “Go!” turn with three simultaneously charging castles…..1 centered around the Tormentbringer, another centered around a Keeper, and the third around The Masque. The result is the castle that contains the Tormentbringer gets [SUSTAINED HITS 1] from Tormentbringer’s aura and +1 to Wound from False Majesty. Then the Keeper’s castle can spend 2 CP to also get +1 to Wound from Archagonists on 2 units while The Masque gives its nearby units +1 to Wound thanks to The Eternal Dance. Even better, if this gets lined up into your opponent’s ranged shooting units, those units can trigger Seductive Gambit after the charge to re-roll Hit rolls and re-roll Wound rolls of 1 instead of keeping Fights First. More realistically, this is done piecemeal, but that’s a huge stack of buffs converging into a single Fight Phase and could make for a massive knockout punch and I can dream….. |
| Fiends + Daemonettes + Thieves of Pain stratagem + Daemonic Infestation stratagem Fiends and Daemonettes operating near each other lets you use Thieves of Pain to funnel incoming damage from one unit to another. Ideally, this gets used to pass Damage from the Fiends to a Daemonette unit that can then heal back up in the next Command Phase. It’s expensive but is a way to keep both units alive and threatening longer than their raw durability would suggest. |
ROUND-BY-ROUND RECAP:
The Harlequins win the roll off and elect to deploy second.
The Chaos Daemons deploy aggressively, pushing the Fiends, Seekers, and Keepers of Secrets to the front of their lines, betting that these three units would be the hardest targets for the Harlequins to answer cleanly. The Daemonettes deploy next as a second wave, trusting the Shudderblink detachment rule’s extra speed to let them close the gap quickly once the front line opens lanes. The Daemons are deployed in two castles, which is expected, but are very much focused on positioning to pressure the center of the board. This makes sense given the Harlequins primary mission and should make for an awkward challenge for the Harlequins to navigate. Ideally, the Daemons want to win the roll to go first so they can Scout the Seekers forward and start applying pressure immediately, either by scoring an action or charging into the Harlequins’ lines.
The Harlequins deploy conservatively, using the full depth of their deployment zone to keep everything out of the Daemons’ immediate reach. Concerned about getting rushed early, they lead with the Starweavers to screen the more vulnerable Skyweavers behind them, protecting their ability to “uppy downy” at all costs. Ideally, the Harlequins want to go second, hoping to weather the Daemons’ opening rush and then use the Skyweavers and reserve Troupe to rack up late-game scoring.
Board state after Deployment is shown below.

Post Deployment
The Harlequins win the roll off and will go first.
The Harlequins elect not to make any Scout Moves, content to keep everything tucked deep in their deployment zone rather than pushing forward early. Looking across the table at a lot of very fast, very scary Daemon units lined up and ready to move, the Harlequins are feeling intimidated heading into the game, as they are not yet sure how they’ll deal with the threat in front of them.
Taking advantage of their Scout Move, Seekers 1 pushed toward Objective 5 to stage, while Seekers 2 moved toward Objective 4 to stage. Both units are positioning themselves to start applying immediate pressure the moment the game begins, in line with the Daemons’ aggressive, center-focused deployment. Despite losing the roll to go first, the Daemons are feeling confident heading into the game, moving up aggressively, and daring the Harlequins to come out and stop them.
Board state at the start of the battle is shown below.

Start of the Battle
ROUND 1:
| Phase: | Go First: Harlequins |
| Score at Start | 10 |
| CP at Start | 0 |
| Command | [Harlequins] Gains 1 Core CP [Chaos Daemons] Gains 1 Core CP [Harlequins] Draw Secondaries: A Tempting Target & Display of Might [Chaos Daemons] Nominates Objective 3 for A Tempting Target |
| Movement | [Harlequins] Troupe 5 Disembarks to Stage [Harlequins] Starweaver 3 Makes a Normal Move onto Objective 4 to Score [Harlequins] Troupe 4 Disembarks [Harlequins] Troupe 4 uses Battle Focus Token: Swift as the Wind [Harlequins] Troupe 4 Makes a Normal Move towards Seekers 1 to Charge [Harlequins] Starweaver 2 Makes a Normal Move onto Objective 5 [Harlequins] Troupe Master 3 + Troupe 3 Makes a Normal Move onto Objective 1 to Stage |
| Shooting | [Harlequins] None |
| Charge | [Harlequins] Troupe 4 Declares a Charge – Charge Succeeded [Harlequins] Troupe 4 Charges into Seekers 1 |
| Fight | [Harlequins] Troupe 4 uses Dance of Death to select Villain’s Doom [Harlequins] Troupe 4 Fights Seekers 1 and Destroys the Unit |
| End of Turn | [Harlequins] Scores Secondary: Display of Might — 2 VP [Harlequins] Scores Primary: Search and Scour — 3 VP [Harlequins] Drops Secondary: A Tempting Target for 1 CP |
| Score at End | 15 |
| CP at End | 3 |
The Harlequins go first and have an interesting turn. Coming into the turn, they were intimidated by the sight of the Daemons arrayed across the table, a feeling sharpened by a Secondary draw that explicitly pushed them toward everything they didn’t want to do…..committing to the midfield en masse and overextending for an objective of the Daemons’ choosing. Instead, the Harlequins settled on a tighter plan of doing what they could without overextending or handing the Daemons easy charges, committing only the empty Starweavers needed to sit on objectives and Troupe 4 to deal with the Seekers, and then protecting the rest of their resources for the storm to come.
The execution matched the plan well. The Harlequins closed the turn with 5 VP, every unit still alive, and a clean kill of Seekers 1. Watching Troupe 4 dispatch the Seekers so easily gave them a confidence boost and measuring out the distances left them with a real shot at holding Objective 5 heading into Round 2. They even got an extra CP by dropping A Tempting Target since there is no way they are going to sign up for committing to a target of the Daemons choice in this game. All in all, this was about as good as could be expected for the Harlequins.
Across the table, the Daemons aren’t rattled. Losing Seekers 1 stings a little, but that unit was always more of a probe than a real commitment, so it’s not a meaningful blow. Now it’s their turn. Let’s see how much ground they can cover and whether the Harlequins’ newfound confidence holds up.
Board state in the middle of Round 1 is shown below.

Middle of Round 1
| Phase: | Go Second: Chaos Daemons |
| Score at Start | 10 |
| CP at Start | 1 |
| Command | [Chaos Daemons] Gains 1 Core CP [Harlequins] Gains 1 Core CP [Chaos Daemons] Draw Secondaries: Display of Might & Outflank |
| Movement | [Chaos Daemons] Keeper of Secrets 2 Makes a Normal Move onto Objective 3 [Chaos Daemons] Seekers 2 Makes a Normal Move towards Starweaver 4 to Score [Chaos Daemons] Fiends 2 Makes a Normal Move towards Starweaver 4 to Stage [Chaos Daemons] Keeper of Secrets 1 Makes a Normal Move onto Objective 4 [Chaos Daemons] Fiends 1 Makes a Normal Move towards Objective 5 to Charge [Chaos Daemons] Tormentbringer Makes a Normal Move towards Objective 4 to Stage [Chaos Daemons] Daemonettes 1 Makes a Normal Move towards Objective 5 to Stage [Chaos Daemons] Daemonettes 2 Makes a Normal Move towards Objective 5 to Stage [Chaos Daemons] Daemonettes 3 Makes a Normal Move onto Objective 2 to Screen [Chaos Daemons] Daemonettes 4 Makes a Normal Move towards Objective 4 to Screen |
| Shooting | [Chaos Daemons] Keeper of Secrets 1 Shoots Starweaver 3 and Deals 1 Damage [Harlequins] Starweaver 3 uses Battle Focus Token: Fade Back [Chaos Daemons] Seekers 2 Performs Vanguard Operation |
| Charge | [Chaos Daemons] Fiends 1 Declares a Charge – Charge Succeeded [Chaos Daemons] Fiends 1 Charges into Troupe 4 |
| Fight | [Harlequins] Troupe 4 uses Dance of Death to select Trickster’s Grace [Chaos Daemons] Fiends 1 Fights Troupe 4 and Destroys the Unit |
| End of Turn | [Chaos Daemons] Scores Primary: Vanguard Operation — 6 VP |
| Score at End | 16 |
| CP at End | 2 |
The Daemons finish their first turn and it feels more like the calm before the storm than an opening salvo. Coming into the turn, the plan was all about positioning and applying pressure without overextending and moving the tougher units up to set up a Round 2 “go turn” while keeping the Daemonettes spaced out to block any Harlequins movement shenanigans. The goal was to max Primary this round, position to score an additional 5 VP off Display of Might during the Harlequins’ turn, and start slowly ratcheting up the scoreboard and board control pressure.
The turn went off exactly as expected. Starweaver 3 reactively moving out of charge range was mildly annoying, but it would have only been a 10 inch charge anyway, so no major loss. Just Aeldari being Aeldari. Best of all, the Daemons now have the midfield in the Shadow of Chaos, which is exactly how they want it to stay for the game.
Across the table, the Harlequins feel the pressure. They feel it from the incoming Fiends and Keepers of Secrets, from the possibility of falling behind on the scoreboard, and from having to play reactively with almost no margin for error. That’s exactly the spot the Daemons want them in, forced to walk a tightrope between overextending to head off the incoming wave or freezing up and getting charged next turn. Let’s see how they navigate it.
Board state at the end of Round 1 is shown below.

End of Round 1
ROUND 2:
| Phase: | Go First: Harlequins |
| Score at Start | 15 |
| CP at Start | 3 |
| Command | [Harlequins] Gains 1 Core CP [Chaos Daemons] Gains 1 Core CP [Harlequins] Draw Secondaries: Secure No Man’s Land & Overwhelming Force [Harlequins] uses New Orders for 1 CP [Harlequins] Drops Secondary: Overwhelming Force [Harlequins] Draws Behind Enemy Lines as a Secondary Objective [Harlequins] Scores Primary: Search and Scour — 4 VP |
| Movement | [Harlequins] Troupe 5 uses Battle Focus Token: Swift as the Wind [Harlequins] Troupe 5 Advances onto Objective 4 to Score [Harlequins] Starweaver 2 uses Take to the Skies [Harlequins] Starweaver 2 Makes a Normal Move towards Fiends 1 to Move Block [Harlequins] Starweaver 1 Makes a Normal Move onto Objective 5 [Harlequins] Starweaver 3 Makes a Normal Move towards Fiends 2 to Move Block [Harlequins] Troupe Master 2 + Troupe 2 Disembarks [Harlequins] Troupe Master 2 + Troupe 2 Makes a Normal Move towards Seekers 2 to Charge [Harlequins] Starweaver 4 Makes a Normal Move towards Seekers 2 [Harlequins] Skyweavers 3 Makes a Normal Move towards Objective 1 |
| Shooting | [Harlequins] Starweaver 4 Shoots Seekers 2 and Destroys the Unit [Harlequins] Starweaver 3 Shoots Fiends 2 and Deals 2 Damage [Harlequins] Starweaver 1 Shoots Fiends 1 and Deals 2 Damage [Harlequins] Starweaver 2 Shoots Fiends 1 and Kills a Model |
| Charge | [Harlequins] Troupe Master 2 + Troupe 2 Declares a Charge – Charge Failed |
| Fight | [Harlequins] None |
| End of Turn | [Harlequins] Starweaver 4 uses Rapid Embarkation [Harlequins] Troupe Master 2 + Troupe 2 Embarks in Starweaver 4 [Harlequins] Scores Secondary: Secure No Man’s Land — 5 VP [Harlequins] Scores Primary: Search and Scour — 5 VP |
| Score at End | 29 |
| CP at End | 2 |
The Harlequins finish their second turn and do just enough to keep scoring well. Coming into the turn, they could feel the storm of Fiends and Keepers of Secrets building on the horizon. The plan was to lean on the Troupe’s Batteline Objective Control to keep the Primary ticking, kill just enough to deny the Daemons secondary VP while scoring their own, and screen with as many Starweavers as possible, hoping that buys enough breathing room to keep scoring next turn.
The turn went better than expected. The Harlequins scored everything they were hoping for and dealt more damage than planned, thanks to Starweaver 4 rolling three of three 6’s for Sustained and Lethal Hits to effectively one-shot Seekers 2. That success carried into the other Starweavers, which started chipping away at the Fiends. It’s not clear yet whether it’ll be enough to blunt the coming wave, but it was a welcome surprise.
Across the table, the Daemons are chomping at the bit. Those tricky elves measured their movement precisely to deny any valuable Heroic Interventions, which the Daemons really wanted to use to get a Keeper of Secrets into the fight. Now it’s their turn and the first wave of Daemon charges looks ready to come in. Let’s see how the Harlequins weather it.
Board state in the middle of Round 2 is shown below.

Middle of Round 2
| Phase: | Go Second: Chaos Daemons |
| Score at Start | 16 |
| CP at Start | 2 |
| Command | [Chaos Daemons] Gains 1 Core CP [Harlequins] Gains 1 Core CP [Chaos Daemons] Draw Secondaries: Cleanse & Overwhelming Force [Chaos Daemons] Scores Primary: Vanguard Operation — 4 VP |
| Movement | [Chaos Daemons] Daemonettes 5 Deep Strikes onto Objective 5 to Perform an Action [Chaos Daemons] Fiends 1 Makes a Normal Move towards Objective 4 to Charge [Harlequins] Troupe 5 uses Weaving Stride for 1 CP [Harlequins] Troupe 5 Makes a Normal Move [Harlequins] Troupe 5 Embarks in Starweaver 3 [Chaos Daemons] Fiends 2 Makes a Normal Move towards Starweaver 4 to Charge [Chaos Daemons] Keeper of Secrets 2 uses Phantasmal Longing for 1 CP [Chaos Daemons] Keeper of Secrets 2 Makes a Normal Move towards Starweaver 4 to Charge [Chaos Daemons] Keeper of Secrets 1 Makes a Normal Move towards Starweaver 3 to Charge [Chaos Daemons] Daemonettes 1 Advances towards Objective 5 to Charge [Chaos Daemons] The Masque of Slaanesh Advances towards Objective 5 to Charge [Chaos Daemons] Daemonettes 6 Deep Strikes onto Objective 3 to Perform an Action [Chaos Daemons] Tormentbringer Makes a Normal Move onto Objective 4 to Perform an Action [Chaos Daemons] Daemonettes 2 Makes a Normal Move towards Objective 5 to Screen |
| Shooting | [Chaos Daemons] Daemonettes 5 Performs Vanguard Operation [Chaos Daemons] Tormentbringer Performs Cleanse on Objective 4 [Chaos Daemons] Daemonettes 6 Performs Cleanse on Objective 3 |
| Charge | [Chaos Daemons] Daemonettes 1 Declares a Charge – Charge Succeeded [Chaos Daemons] Daemonettes 1 Charges into Starweaver 2 [Chaos Daemons] Daemonettes 1 uses Seductive Gambit [Chaos Daemons] Fiends 1 Declares a Charge – Charge Succeeded [Chaos Daemons] Fiends 1 Charges into Starweaver 1 and Starweaver 2 [Chaos Daemons] Fiends 1 uses Seductive Gambit [Chaos Daemons] The Masque of Slaanesh Declares a Charge – Charge Succeeded [Chaos Daemons] The Masque of Slaanesh Charges into Starweaver 2 [Chaos Daemons] The Masque of Slaanesh uses Seductive Gambit [Chaos Daemons] Fiends 2 Declares a Charge – Charge Succeeded [Chaos Daemons] Fiends 2 Charges into Starweaver 3 and Starweaver 4 [Chaos Daemons] Fiends 2 uses Seductive Gambit [Chaos Daemons] Keeper of Secrets 1 Declares a Charge – Charge Succeeded [Chaos Daemons] Keeper of Secrets 1 Charges into Starweaver 3 [Chaos Daemons] Keeper of Secrets 1 uses Seductive Gambit [Chaos Daemons] Keeper of Secrets 2 Declares a Charge – Charge Succeeded [Chaos Daemons] Keeper of Secrets 2 Charges into Starweaver 4 [Chaos Daemons] Keeper of Secrets 2 uses Seductive Gambit |
| Fight | [Chaos Daemons] The Masque of Slaanesh uses The Eternal Dance to give +1 to Wound on Starweaver 2 [Chaos Daemons] Fiends 1 and Fiends 2 use Archagonists for 2 CP [Chaos Daemons] Fiends 2 Split Fires and Fights Starweaver 3 to Destroy the Unit and Fights Starweaver 4 to Destroy the Unit [Harlequins] Troupe 5 Makes an Emergency Disembarkation [Harlequins] Troupe 5 Loses 1 Model [Harlequins] Troupe Master + Troupe 2 Makes an Emergency Disembarkation [Harlequins] Troupe Master + Troupe 2 Loses 2 Models [Harlequins] Starweaver 2 Fights The Masque of Slaanesh and Deals 1 Damage [Chaos Daemons] Keeper of Secrets 2 Makes an Overrun Move into Troupe Master + Troupe 2 [Chaos Daemons] Keeper of Secrets 2 Fights Troupe Master + Troupe 2 and Destroys the Unit [Harlequins] Starweaver 1 Fights Fiends 1 and Deals 1 Damage [Chaos Daemons] Keeper of Secrets 1 Makes an Overrun Move into Troupe 5 [Chaos Daemons] Keeper of Secrets 1 Fights Troupe 5 and Kills 4 Models [Harlequins] Troupe 5 Fights Keeper of Secrets 1 and Deals 0 Damage [Chaos Daemons] Fiends 1 Split Fires and Fights Starweaver 1 to Deal 4 Damage and Fights Starweaver 2 to Destroy the Unit |
| End of Turn | [Chaos Daemons] Scores Secondary: Outflank — 5 VP [Chaos Daemons] Scores Secondary: Cleanse — 5 VP [Chaos Daemons] Scores Primary: Vanguard Operation — 6 VP [Harlequins] Skyweavers 3 uses Skyward Lunge for 1 CP |
| Score at End | 36 |
| CP at End | 1 |
The Daemons engage their first “go turn” and it is borderline oppressive. Coming into the turn, this was going to be “go time” for the first wave, with the goal of getting the Fiends stuck in and ideally landing a Keeper of Secrets in combat too. The secondary draw of Cleanse felt like a bit of a bummer at first, not an obvious fit for this kind of aggressive turn, but the Daemons quickly realized it actually aligned well with staging up the second wave and holding onto the midfield Shadow of Chaos. The execution went way better than expected. Turns out Warhammer 40K is an easy game if you can land 8 and 10 inch charges with your biggest units. Better still, since every target was a vehicle with no serious melee attacks back, the entire Daemons army got to trigger Seductive Gambit off the charge. That added up to a huge amount of incoming damage for the Harlequins.
From the Harlequins’ side, the turn felt brutal, like a tidal wave crashing into them, and staring at the board state afterward made it hard not to panic a little. Taking a step back, though, it wasn’t quite as brutal as it felt, and inducing that exact feeling of panic is part of the Daemons’ strategy. The Harlequins did lose a lot, most of it expected: three Starweavers and one Troupe Master + Troupe unit gone. On the plus side, some overperformed Invulnerable Saves which kept Starweaver 1 (and Troupe Master + Troupe 1 inside it) and Troupe 5 alive.
At first glance, the Harlequins are in big trouble. They’ve been blown out of the midfield, their right flank has collapsed, and a Keeper of Secrets is standing at the edge of their deployment zone. Looking closer, though, the left flank still looks salvageable and the big 12-model Troupe + Troupe Master unit could be used to occupy that Keeper in the center. Let’s see if the Harlequins can keep grinding or if this is curtains for their performance.
Board state at the end of Round 2 is shown below.

End of Round 2
ROUND 3:
| Phase: | Go First: Harlequins |
| Score at Start | 29 |
| CP at Start | 2 |
| Command | [Harlequins] Gains 1 Core CP [Chaos Daemons] Gains 1 Core CP [Harlequins] Draw Secondaries: Bring it Down & Defend Stronghold [Harlequins] uses New Orders for 1 CP [Harlequins] Drops Secondary: Defend Stronghold [Harlequins] Draws Beacon as a Secondary Objective [Harlequins] Nominates Skyweavers 1 for Beacon [Harlequins] Troupe 5 Fails Battle Shock [Harlequins] Troupe 5 takes 2 Mortal Wounds and is destroyed |
| Movement | [Harlequins] Death Jester moves onto Objective 5 to Shoot [Harlequins] Skyweavers 1 Makes a Normal Move towards Objective 5 to Charge [Harlequins] Troupe Master + Troupe 1 Disembarks [Harlequins] Troupe Master + Troupe 1 Makes a Normal Move towards The Masque of Slaanesh to Shoot and Charge [Harlequins] Skyweavers 2 uses Battle Focus Token: Swift as the Wind [Harlequins] Skyweavers 2 uses Take to the Skies [Harlequins] Skyweavers 2 Makes a Normal Move towards Fiends 1 to Shoot and Charge [Harlequins] Starweaver 1 passes Desperate Escape [Harlequins] Starweaver 1 Falls Back onto Objective 5 [Harlequins] Solitaire uses Battle Focus Token: Swift as the Wind [Harlequins] Solitaire Advances towards Objective 5 to Stage |
| Shooting | [Harlequins] Skyweavers 2 Shoots Fiends 1 and Kills 1 Model [Harlequins] Death Jester Shoots Fiends 1 and Kills 1 Model [Harlequins] Skyweavers 1 Shoots Daemonettes 5 and Kills 4 Models [Harlequins] Troupe Master + Troupe 1 Split Fires and Shoots Fiends 1 to Kill 1 Model and Shoots The Masque of Slaanesh to Deal 1 Damage [Harlequins] Troupe Master + Troupe 3 Shoots Keeper of Secrets 1 and Deals 1 Damage |
| Charge | [Harlequins] Skyweavers 1 Declares a Charge – Charge Succeeded [Harlequins] Skyweavers 1 Charges into Daemonettes 5 [Harlequins] Troupe Master + Troupe 1 Declares a Charge – Charge Succeeded [Harlequins] Troupe Master + Troupe 1 Charges into Daemonettes 1, The Masque of Slaanesh, and Fiends 1 [Harlequins] Troupe Master + Troupe 3 Declares a Charge – Charge Succeeded [Harlequins] Troupe Master + Troupe 3 Charges into Keeper of Secrets 1 [Harlequins] Skyweavers 2 Declares a Charge – Charge Failed |
| Fight | [Harlequins] Troupe Master + Troupe 1 uses Fangs of the Brood for 1 CP [Harlequins] Troupe Master + Troupe 1 uses Dance of Death to select Hero’s Prowess, Villain’s Doom, and Trickster’s Grace [Harlequins] Troupe Master + Troupe 3 uses Dance of Death to select Trickster’s Grace [Chaos Daemons] The Masque of Slaanesh uses The Eternal Dance to give Troupe Master + Troupe 1 -1 to Wound on its attacks [Chaos Daemons] Daemonettes 5 uses Horrifying Beauty [Harlequins] Skyweavers 1 passes Battle Shock [Chaos Daemons] Daemonettes 1 uses Horrifying Beauty [Harlequins] Troupe Master + Troupe 1 passes Battle Shock [Chaos Daemons] Fiends 1 uses Overwhelming Excess for 1 CP [Harlequins] Troupe Master + Troupe 1 Split Fires and Fights Fiends 1 to Deal 1 Damage, Fights The Masque of Slaanesh and Destroy the Unit, and Fights Daemonettes 1 to Destroy the Unit [Chaos Daemons] Daemonettes 5 uses Fights First [Chaos Daemons] Daemonettes 5 Fights Skyweavers 1 and Deals 2 Damage [Harlequins] Troupe Master + Troupe 3 Fights Keeper of Secrets 1 and Deals 7 Damage [Harlequins] Skyweavers 1 Fights Daemonettes 5 and Destroys the Unit [Chaos Daemons] Fiends 1 Fights Troupe Master + Troupe 1 and Deals 0 Damage [Chaos Daemons] Keeper of Secrets 1 Fights Troupe Master + Troupe 3 and Kills 7 Models |
| End of Turn | [Harlequins] None |
| Score at End | 29 |
| CP at End | 1 |
Facing a tremendous amount of pressure, the Harlequins attempt to dig out from under the wall of bodies the Daemons have thrown at them. Coming into the turn, this felt like the make-or-break moment for their whole game. The Daemons were sitting on the doorstep of the Harlequins’ deployment zone, effectively jailing them in, and if they couldn’t break free this turn, it could spell the end of their performance in this battle report. The plan was to focus a breakout on the flank near Objective 5 while using the big brick of Troupe to pin Keeper of Secrets 1 against terrain for a round. It’s a stalling tactic, but it’s all they have at this point.
Execution-wise, the turn was simply okay. Keeper of Secrets 1 is pinned against terrain and looks stuck there next turn, though it killed more Troupe than the Harlequins were hoping for thanks to some hot rolling. The Objective 5 breakout didn’t quite get them out of jail either, as some clever use of debuff abilities and stratagems from the Daemons blunted the attempt. Fiends 1 is still standing and that does not bode well for next turn.
Across the table, the Daemons are still feeling confident. The breakout attempt near Objective 5 hurt, but it isn’t crippling and the Daemons have Fiends 1 and Daemonettes 2 positioned to charge right back in to keep the pressure on. Better still, the Harlequins scored 0 VP this turn. The Daemons can practically smell a 20-0 blowout coming.
Board state in the middle of Round 3 is shown below.

Middle of Round 3
| Phase: | Go Second: Chaos Daemons |
| Score at Start | 36 |
| CP at Start | 1 |
| Command | [Chaos Daemons] Gains 1 Core CP [Harlequins] Gains 1 Core CP [Chaos Daemons] Draw Secondaries: Centre Ground & A Grievous Blow [Chaos Daemons] Fiends 1 passes Battle Shock [Chaos Daemons] Fiends 1 uses Daemonic Manifestation to heal 1 Wound [Chaos Daemons] Scores Primary: Vanguard Operation — 4 VP |
| Movement | [Chaos Daemons] Keeper of Secrets 2 uses Phantasmal Longing for 1 CP [Chaos Daemons] Keeper of Secrets 2 Makes a Normal Move onto Objective 1 to Perform an Action [Chaos Daemons] Fiends 2 Makes a Normal Move towards Troupe Master + Troupe 3 to Charge [Chaos Daemons] Tormentbringer Makes a Normal Move onto Objective 4 to Score [Chaos Daemons] Daemonettes 2 Advances towards Objective 5 to Charge [Harlequins] Skyweavers 3 uses Rapid Ingress for 1 CP [Harlequins] Skyweavers 3 Deploys From Reserves near Objective 3 |
| Shooting | [Chaos Daemons] Keeper of Secrets 2 Performs Vanguard Operation [Chaos Daemons] Keeper of Secrets 1 Shoots Skyweavers 2 and Deals 2 Damage [Harlequins] Skyweavers 2 uses Battle Focus Token: Fade Back |
| Charge | [Chaos Daemons] Fiends 2 Declares a Charge – Charge Succeeded [Chaos Daemons] Fiends 2 Charges into Troupe Master + Troupe 3 [Chaos Daemons] Daemonettes 2 Declares a Charge – Charge Succeeded [Chaos Daemons] Daemonettes 2 Charges into Troupe Master + Troupe 1 [Chaos Daemons] Daemonettes 6 Declares a Charge – Charge Failed |
| Fight | [Chaos Daemons] Daemonettes 2 uses Horrifying Beauty [Harlequins] Troupe Master + Troupe 1 passes Battle Shock [Harlequins] Troupe Master + Troupe 1 uses Dance of Death to select Trickster’s Grace [Harlequins] Troupe Master + Troupe 3 uses Dance of Death to select Trickster’s Grace [Chaos Daemons] Fiends 2 Fights Troupe Master + Troupe 3 and Kills 5 Models [Chaos Daemons] Daemonettes 2 Fights Troupe Master + Troupe 1 and Destroys the Unit [Harlequins] Troupe Master + Troupe 3 Fights Keeper of Secrets 1 and Deals 4 Damage [Chaos Daemons] Keeper of Secrets 1 Fights Troupe Master + Troupe 3 and Destroys the Unit [Chaos Daemons] Keeper of Secrets 1 uses Soul Glutton to heal 2 Wounds |
| End of Turn | [Chaos Daemons] Scores Secondary: Centre Ground — 5 VP [Chaos Daemons] Scores Secondary: A Grievous Blow — 5 VP [Chaos Daemons] Scores Primary: Vanguard Operation — 6 VP [Harlequins] Skyweavers 1 uses Skyward Lunge for 1 CP |
| Score at End | 56 |
| CP at End | 1 |
The Daemons finish their third turn by keeping the pressure on the Harlequins, especially on the scoreboard. Coming into the turn, they really wanted to start putting the Harlequins away and lock up the Skyweavers, but the Harlequins have been too crafty to make that a possibility. Instead, the plan shifted to finishing off the remaining Troupe units while maximizing points.
The turn went exactly as expected. The Daemons finished off the Troupe while also running up a lot of VP. They are now way ahead on the scoreboard, despite the slippery Skyweavers getting one over on them again.
Across the table, the Harlequins are feeling better than last turn. It’s looking like they’ll have a chance to restart their scoring next turn, and they’ve effectively broken out of jail. They’re not going to be able to slow the Daemons down or win the game, so the new goal is to avoid a 20-0 WTC differential scoring blowout.
Board state at the end of Round 3 is shown below.

End of Round 3
ROUND 4:
| Phase: | Go First: Harlequins |
| Score at Start | 29 |
| CP at Start | 0 |
| Command | [Harlequins] Gains 1 Core CP [Chaos Daemons] Gains 1 Core CP [Harlequins] Draw Secondaries: Centre Ground & Cleanse [Harlequins] Starweaver 1 Fails Battle Shock [Harlequins] Starweaver 1 takes 1 Mortal Wound and is destroyed [Harlequins] Scores Primary: Search and Scour — 4 VP |
| Movement | [Harlequins] Skyweavers 3 uses Battle Focus Token: Swift as the Wind [Harlequins] Skyweavers 3 uses Take to the Skies [Harlequins] Skyweavers 3 Makes a Normal Move onto Objective 3 to Shoot and Charge [Harlequins] Skyweavers 1 Deploys From Reserves near Objective 1 to Score [Harlequins] Skyweavers 2 uses Take to the Skies [Harlequins] Skyweavers 2 Makes a Normal Move towards Objective 5 to Shoot and Charge [Harlequins] Death Jester moves onto Objective 5 to Shoot [Harlequins] Solitaire uses Battle Focus Token: Swift as the Wind [Harlequins] Solitaire uses Blitz [Harlequins] Solitaire Advances towards Daemonettes 2 to Charge |
| Shooting | [Harlequins] Skyweavers 3 Shoots Daemonettes 4 and Kills 2 Models [Harlequins] Death Jester Shoots Fiends 1 and Deals 2 Damage [Harlequins] Skyweavers 2 Shoots Keeper of Secrets 1 and Deals 0 Damage |
| Charge | [Harlequins] Skyweavers 2 Declares a Charge – Charge Succeeded [Harlequins] Skyweavers 2 Charges into Fiends 1 [Harlequins] Skyweavers 3 Declares a Charge – Charge Succeeded [Harlequins] Skyweavers 3 Charges into Daemonettes 6 [Harlequins] Solitaire Declares a Charge – Charge Succeeded [Harlequins] Solitaire Charges into Daemonettes 2 [Harlequins] Skyweavers 1 Declares a Charge – Charge Failed [Chaos Daemons] Keeper of Secrets 1 uses Heroic Intervention for 1 CP [Chaos Daemons] Keeper of Secrets 1 Declares a Charge – Charge Succeeded [Chaos Daemons] Keeper of Secrets 1 Charges into Skyweavers 2 |
| Fight | [Chaos Daemons] Daemonettes 2 uses Horrifying Beauty [Harlequins] Solitaire fails Battle Shock [Chaos Daemons] Daemonettes 6 uses Horrifying Beauty [Harlequins] Skyweavers 3 passes Battle Shock [Chaos Daemons] Daemonettes 6 uses Overwhelming Excess for 1 CP [Harlequins] Skyweavers 3 Fights Daemonettes 6 and Kills 1 Model [Chaos Daemons] Daemonettes 2 use Fights First [Chaos Daemons] Daemonettes 2 Fights Solitaire and Destroys the Unit [Harlequins] Skyweavers 2 Fights Fiends 1 and Destroys the Unit [Chaos Daemons] Keeper of Secrets 1 Fights Skyweavers 2 and Kills 2 Models [Harlequins] Skyweavers 3 uses Weaver’s Coils for 1 CP [Harlequins] Skyweavers 3 Falls Back into the Chaos Daemons Deployment Zone [Chaos Daemons] Keeper of Secrets 1 uses Soul Glutton to heal 2 Wounds |
| End of Turn | [Harlequins] Scores Secondary: Behind Enemy Lines — 5 VP [Harlequins] Drops Secondary: Centre Ground for +1 CP [Chaos Daemons] Scores Secondary: Display of Might — 5 VP |
| Score at End | 43 |
| CP at End | 2 |
Harlequins finish their fourth turn and they are starting to press as things continue to not go their way. Coming into the turn, the plan was to restart their scoring in hopes of getting above 50 VP by the end of the game. That meant getting two Skyweaver units into the Chaos Daemons’ deployment zone to score secondaries, ideally paired with killing a unit on an Objective and clearing out a lot of the units around Objective 5 to restart the primary as well.
Execution was spotty this turn as the pressure of the game started to take its toll on the Harlequins, who made two mistakes this turn. First, they discovered they’d left Troupe 6 in Reserves last turn, meaning it dies there since it didn’t come out by Round 3. Then they sent in the Solitaire, which felt like a brilliant play until the Daemonettes Battle Shocked it and used Fights First to kill it before it could do anything. Combine that with Daemonettes 6 getting unbelievable value out of a -1 to hit debuff stratagem against Skyweavers 3 and the turn did not go the Harlequins’ way.
Across the table, the Daemons are thinking it’s time to go for the throat and finish the Harlequins off. It remains to be seen if they can manage it, but they’re going to try.
Board state in the middle of Round 4 is shown below.

Middle of Round 4
| Phase: | Go Second: Chaos Daemons |
| Score at Start | 61 |
| CP at Start | 1 |
| Command | [Chaos Daemons] Gains 1 Core CP [Harlequins] Gains 1 Core CP [Chaos Daemons] Draw Secondaries: Assassination & Burden of Trust [Chaos Daemons] Nominates Keeper of Secrets 2 to Guard Objective 1 [Chaos Daemons] Nominates Tormentbringer to Guard Objective 4 [Chaos Daemons] Nominates Keeper of Secrets 2 to Guard Objective 2 [Chaos Daemons] Nominates Daemonettes 2 to Guard Objective 5 [Chaos Daemons] Nominates Daemonettes 6 to Guard Objective 3 [Chaos Daemons] Scores Primary: Vanguard Operation — 4 VP |
| Movement | [Chaos Daemons] Fiends 2 Makes a Normal Move towards Objective 5 to Charge [Chaos Daemons] Daemonettes 6 Makes a Normal Move onto Objective 3 to Charge [Chaos Daemons] Daemonettes 4 Makes a Normal Move towards Objective 3 to Charge |
| Shooting | [Chaos Daemons] Keeper of Secrets 2 Performs Vanguard Operation [Chaos Daemons] Keeper of Secrets 1 Shoots Skyweavers 2 and Deals 1 Damage [Chaos Daemons] Keeper of Secrets 1 fails a Hazardous test and takes 3 Mortal Wounds |
| Charge | [Chaos Daemons] Daemonettes 6 Declares a Charge – Charge Succeeded [Chaos Daemons] Daemonettes 6 Charges into Skyweavers 3 [Chaos Daemons] Daemonettes 4 Declares a Charge – Charge Succeeded [Chaos Daemons] Daemonettes 4 Charges into Skyweavers 3 [Chaos Daemons] Fiends 2 Declares a Charge – Charge Succeeded [Chaos Daemons] Fiends 2 Charges into Skyweavers 2 [Chaos Daemons] Daemonettes 2 Declares a Charge – Charge Succeeded [Chaos Daemons] Daemonettes 2 Charges into Death Jester |
| Fight | [Chaos Daemons] Daemonettes 2 uses Horrifying Beauty [Harlequins] Death Jester fails Battle Shock [Harlequins] Death Jester takes 2 Mortal Wounds [Chaos Daemons] Daemonettes 6 uses Horrifying Beauty [Harlequins] Skyweavers 3 passes Battle Shock [Chaos Daemons] Fiends 2 Fights Skyweavers 2 and Deals 0 Damage [Chaos Daemons] Daemonettes 6 Fights Skyweavers 3 and Kills 1 Model [Chaos Daemons] Daemonettes 4 Fights Skyweavers 3 and Kills 1 Model [Chaos Daemons] Daemonettes 2 Fights Death Jester and Destroys the Unit [Chaos Daemons] Keeper of Secrets 1 Fights Skyweavers 2 and Destroys the Unit [Chaos Daemons] Daemonettes 6 uses Overwhelming Excess for 1 CP [Harlequins] Skyweavers 3 Fights Daemonettes 6 and Kills 3 Models |
| End of Turn | [Chaos Daemons] Scores Secondary: Assassination — 5 VP [Chaos Daemons] Scores Secondary: Overwhelming Force — 5 VP [Chaos Daemons] Scores Primary: Vanguard Operation — 6 VP [Harlequins] Scores Secondary: Beacon — 5 VP |
| Score at End | 81 |
| CP at End | 0 |
The Daemons close out Round 4 with yet another strong turn and this is looking like curtains for the Harlequins. Coming into the turn, the plan was to kill the Harlequins out of the midfield and their own deployment zone and then to tarpit the Skyweavers in order to lock the Harlequins out of any more primary scoring.
Execution went perfectly as the Harlequins are now staring at a really tough road to 50 VP, as scoring Primary looks to be all but impossible now.
Across the table, the Harlequins are feeling desperate as they are running out of options.
Board state at the end of Round 4 is shown below.

End of Round 4
ROUND 5:
| Phase: | Go First: Harlequins |
| Score at Start | 43 |
| CP at Start | 2 |
| Command | [Harlequins] Gains 1 Core CP [Chaos Daemons] Gains 1 Core CP [Harlequins] Draw Secondaries: Plunder & Engage on All Fronts [Harlequins] uses New Orders for 1 CP [Harlequins] Drops Secondary: Engage on All Fronts [Harlequins] Draws Assassination as a Secondary Objective [Harlequins] Skyweavers 3 uses Insane Bravery for 1 CP |
| Movement | [Harlequins] None |
| Shooting | [Harlequins] Skyweavers 1 Performs Plunder |
| Charge | [Harlequins] None |
| Fight | [Chaos Daemons] Daemonettes 6 uses Horrifying Beauty [Harlequins] Skyweavers 3 passes Battle Shock [Chaos Daemons] Daemonettes 6 uses Overwhelming Excess for 1 CP [Harlequins] Skyweavers 3 Fights Daemonettes 6 and Kills 4 Models [Chaos Daemons] Daemonettes 6 Fights Skyweavers 3 and Deals 2 Damage [Chaos Daemons] Daemonettes 4 Fights Skyweavers 3 and Kills 1 Model |
| End of Turn | [Harlequins] Scores Secondary: Plunder — 5 VP [Chaos Daemons] Scores Secondary: Burden of Trust — 5 VP |
| Score at End | 48 |
| CP at End | 1 |
The Harlequins finish their last turn and don’t quite get to 50 VP.
Board state in the middle of Round 5 is shown below.

Middle of Round 5
| Phase: | Go Second: Chaos Daemons |
| Score at Start | 81 |
| CP at Start | 0 |
| Command | [Chaos Daemons] Gains 1 Core CP [Harlequins] Gains 1 Core CP [Chaos Daemons] Draw Secondaries: A Tempting Target & Behind Enemy Lines [Chaos Daemons] Daemonettes 6 passes Battle Shock [Chaos Daemons] Daemonettes 6 uses Daemonic Manifestation to return 2 Models [Chaos Daemons] Keeper of Secrets 1 passes Battle Shock [Chaos Daemons] Keeper of Secrets 1 uses Daemonic Manifestation to heal 2 Wounds |
| Movement | [Chaos Daemons] Daemonettes 6 Falls Back [Chaos Daemons] Daemonettes 4 Falls Back [Chaos Daemons] Fiends 2 Makes a Normal Move into the Harlequins Deployment Zone |
| Shooting | [Chaos Daemons] Keeper of Secrets 2 Performs Vanguard Operation |
| Charge | [Chaos Daemons] None |
| Fight | [Chaos Daemons] None |
| End of Turn | [Chaos Daemons] Scores Secondary: Behind Enemy Lines — 5 VP [Chaos Daemons] Scores Primary: Vanguard Operation — 8 VP [Chaos Daemons] Scores Primary: Vanguard Operation — 10 VP |
| Score at End | 100 |
| CP at End | 1 |
And that’s the game. It ends up as a 20-0 blow out, using WTC differential scoring, for the Daemons.
Board state at the end of Round 5 is shown below.

End of Round 5
RESULT:
Singles Format: 100 – 48 Chaos Daemons WIN
WTC Teams Format: 20 – 0 Chaos Daemons WIN
GAME REVIEW:
This was easily the “sweatiest” game played in a while, packed with microstrategy and core rules interactions that needed precise sequencing of abilities and counter-abilities, especially through the Movement, Charge, and Fight phases.
The Daemons’ gameplan worked out well as they cruised to a big victory. The Keepers of Secrets and Fiends proved too much for the Harlequins to handle, and the Daemonettes turned out surprisingly tanky once paired with the Overwhelming Excess stratagem to debuff the enemy. Priority Assets also proved the right Force Disposition call over Reconnaissance, letting the Daemons tempo the game around applying pressure where needed rather than just pushing forward for the sake of movement. Mistakes were certainly made along the way and there is definitely room to be more aggressive with the use of Seductive Gambits, but this was a strong first outing for the list.
For the Harlequins, this was always going to be an uphill battle as mono-Quins simply doesn’t have the tools to deal with Monsters without using Fire Dragons. They absorbed most of the fallout from how intense and “sweaty” the game got, making more mistakes than the Daemons and it likely cost them around 10 VP. Not their best showing.
Rounds 2 and 3 were the turning point. Round 2 is when the Daemons started applying real pressure and Round 3 is when that pressure started inducing mistakes from the Harlequins.
POST-GAME EVALUATION:
Harlequins
| Category | Rating | Notes |
| Strategic – List Development | 3 — Mixed | List could use anti-Monster units, but that is an intentional choice as I prefer “mono-Quins” |
| Strategic – Force Disposition / Detachment | 5 — Worked Great | Recon is the right choice for this list. Purge the Foe would have been a nightmare in this matchup. |
| Strategic – Win Condition | 5 — Worked Great | The Win Condition was well defined. As for execution….we’ll see later. |
| Strategic – Game Focus Area | 2 — Mostly Didn’t Work | I’m not sure it was avoidable, but The Keepers of Secrets bullied the Harlequins all game long |
| Strategic – Deployment | 4 — Mostly Worked | This was always going to be a tough one and I don’t see any obvious misteps in deployment. |
| Tactical – Movement / Positioning | 2 — Mostly Didn’t Work | They got boxed into a corner early and then got sloppy with movement in Round 3 on the way to making a few big mistakes. |
| Tactical – Target Priority / Sequencing | 2 — Mostly Didn’t Work | This was another area where they got sloppy as the Daemons were able to use Fights First to really punish them in key turns. |
| Tactical – CP Usage | 5 — Worked Great | If anything, this matchup removed a lot of their chances to use CP. That led to having more CP than expected. |
| Tactical – Primary Scoring | 1 — Didn’t Work | This is where they really lost the game. They didn’t have the ability to consistently score Primary in this matchup. |
| Tactical – Secondary Scoring | 2 — Mostly Didn’t Work | Its hard to score Secondaries from your Deployment Zone and even harder to do so when most of your army is dead. |
Chaos Daemons
| Category | Rating | Notes |
| Strategic – List Development | 5 — Worked Great | List felt really strong and I don’t have any changes that I would make at this point. |
| Strategic – Force Disposition / Detachment | 5 — Worked Great | As noted in the Game Recap, Priority Assets gave the list more ability to control the tempo of the game. |
| Strategic – Win Condition | 5 — Worked Great | The Win Condition was well defined and the Daemons followed it to victory. |
| Strategic – Game Focus Area | 5 — Worked Great | This was more than just “getting a feel for the list”. This felt very natural and I am excited to try it again. |
| Strategic – Deployment | 5 — Worked Great | Deployment supported Win Condition on the way to a big victory. |
| Tactical – Movement / Positioning | 5 — Worked Great | They were “on point” with this all game. The only potential criticism was losing the Seekers early, but even that served a purpose. |
| Tactical – Target Priority / Sequencing | 5 — Worked Great | Another area where the Daemons were “on point” all game. They also did a great job of denying the Harlequins access to the Daemonettes until the Troupe were all gone. |
| Tactical – CP Usage | 5 — Worked Great | This is a CP hungry list and they never felt starved for CP when they needed it. |
| Tactical – Primary Scoring | 5 — Worked Great | They maxed out Primary Scoring and would have kept going if they could. |
| Tactical – Secondary Scoring | 5 — Worked Great | They maxed out Secondary scoring. |
EARNED THEMSELF A NAME:
Keeper of Secrets 1 – It blocked the Harlequins out of any access to the Central Objective, drastically reducing their Primary scoring potential. It bullied its way into their Deployment Zone and demanded the attention of a lot of strong units, which it then killed. Soul Glutton and Daemonic Manifestation kept it topped up on Wounds and made it virtually unkillable.
Honourable Mention: Keeper of Secrets 2 – A quieter game, but it repeatedly performed Vanguard Operation to keep Primary ticking and picked up an Overrun kill on Troupe Master + Troupe 2 in Round 2.
MAGNUS OF THE GAME:
The Harlequins pilot’s ability to make decisions under pressure. Their game got sloppy in Rounds 3 and 4, which resulted in the blow out victory. Two examples of the sloppy play included:
– Troupe 6 — never even made it onto the table. Left in Reserves and automatically destroyed for missing the Round 3 arrival deadline (a full unit’s points delivering zero value).
– Solitaire — finally committed to action in Round 4, but got Battle Shocked and killed via Fights First by Daemonettes 2 before it could do anything.



Leave a Reply