

This week’s Grown Men Playing With Toys’ Battle Report features the Chaos Space Marines Creations of Bile against the Tyranids Invasion Fleet playing Purge the Foe on a Hammer and Anvil Deployment with GW Terrain Pack 7.
As backdrop for the game….Fabius Bile has spent thousands of years trying to perfect the human form, always searching for the next iteration of what humanity could become if it was willing to discard what it was.
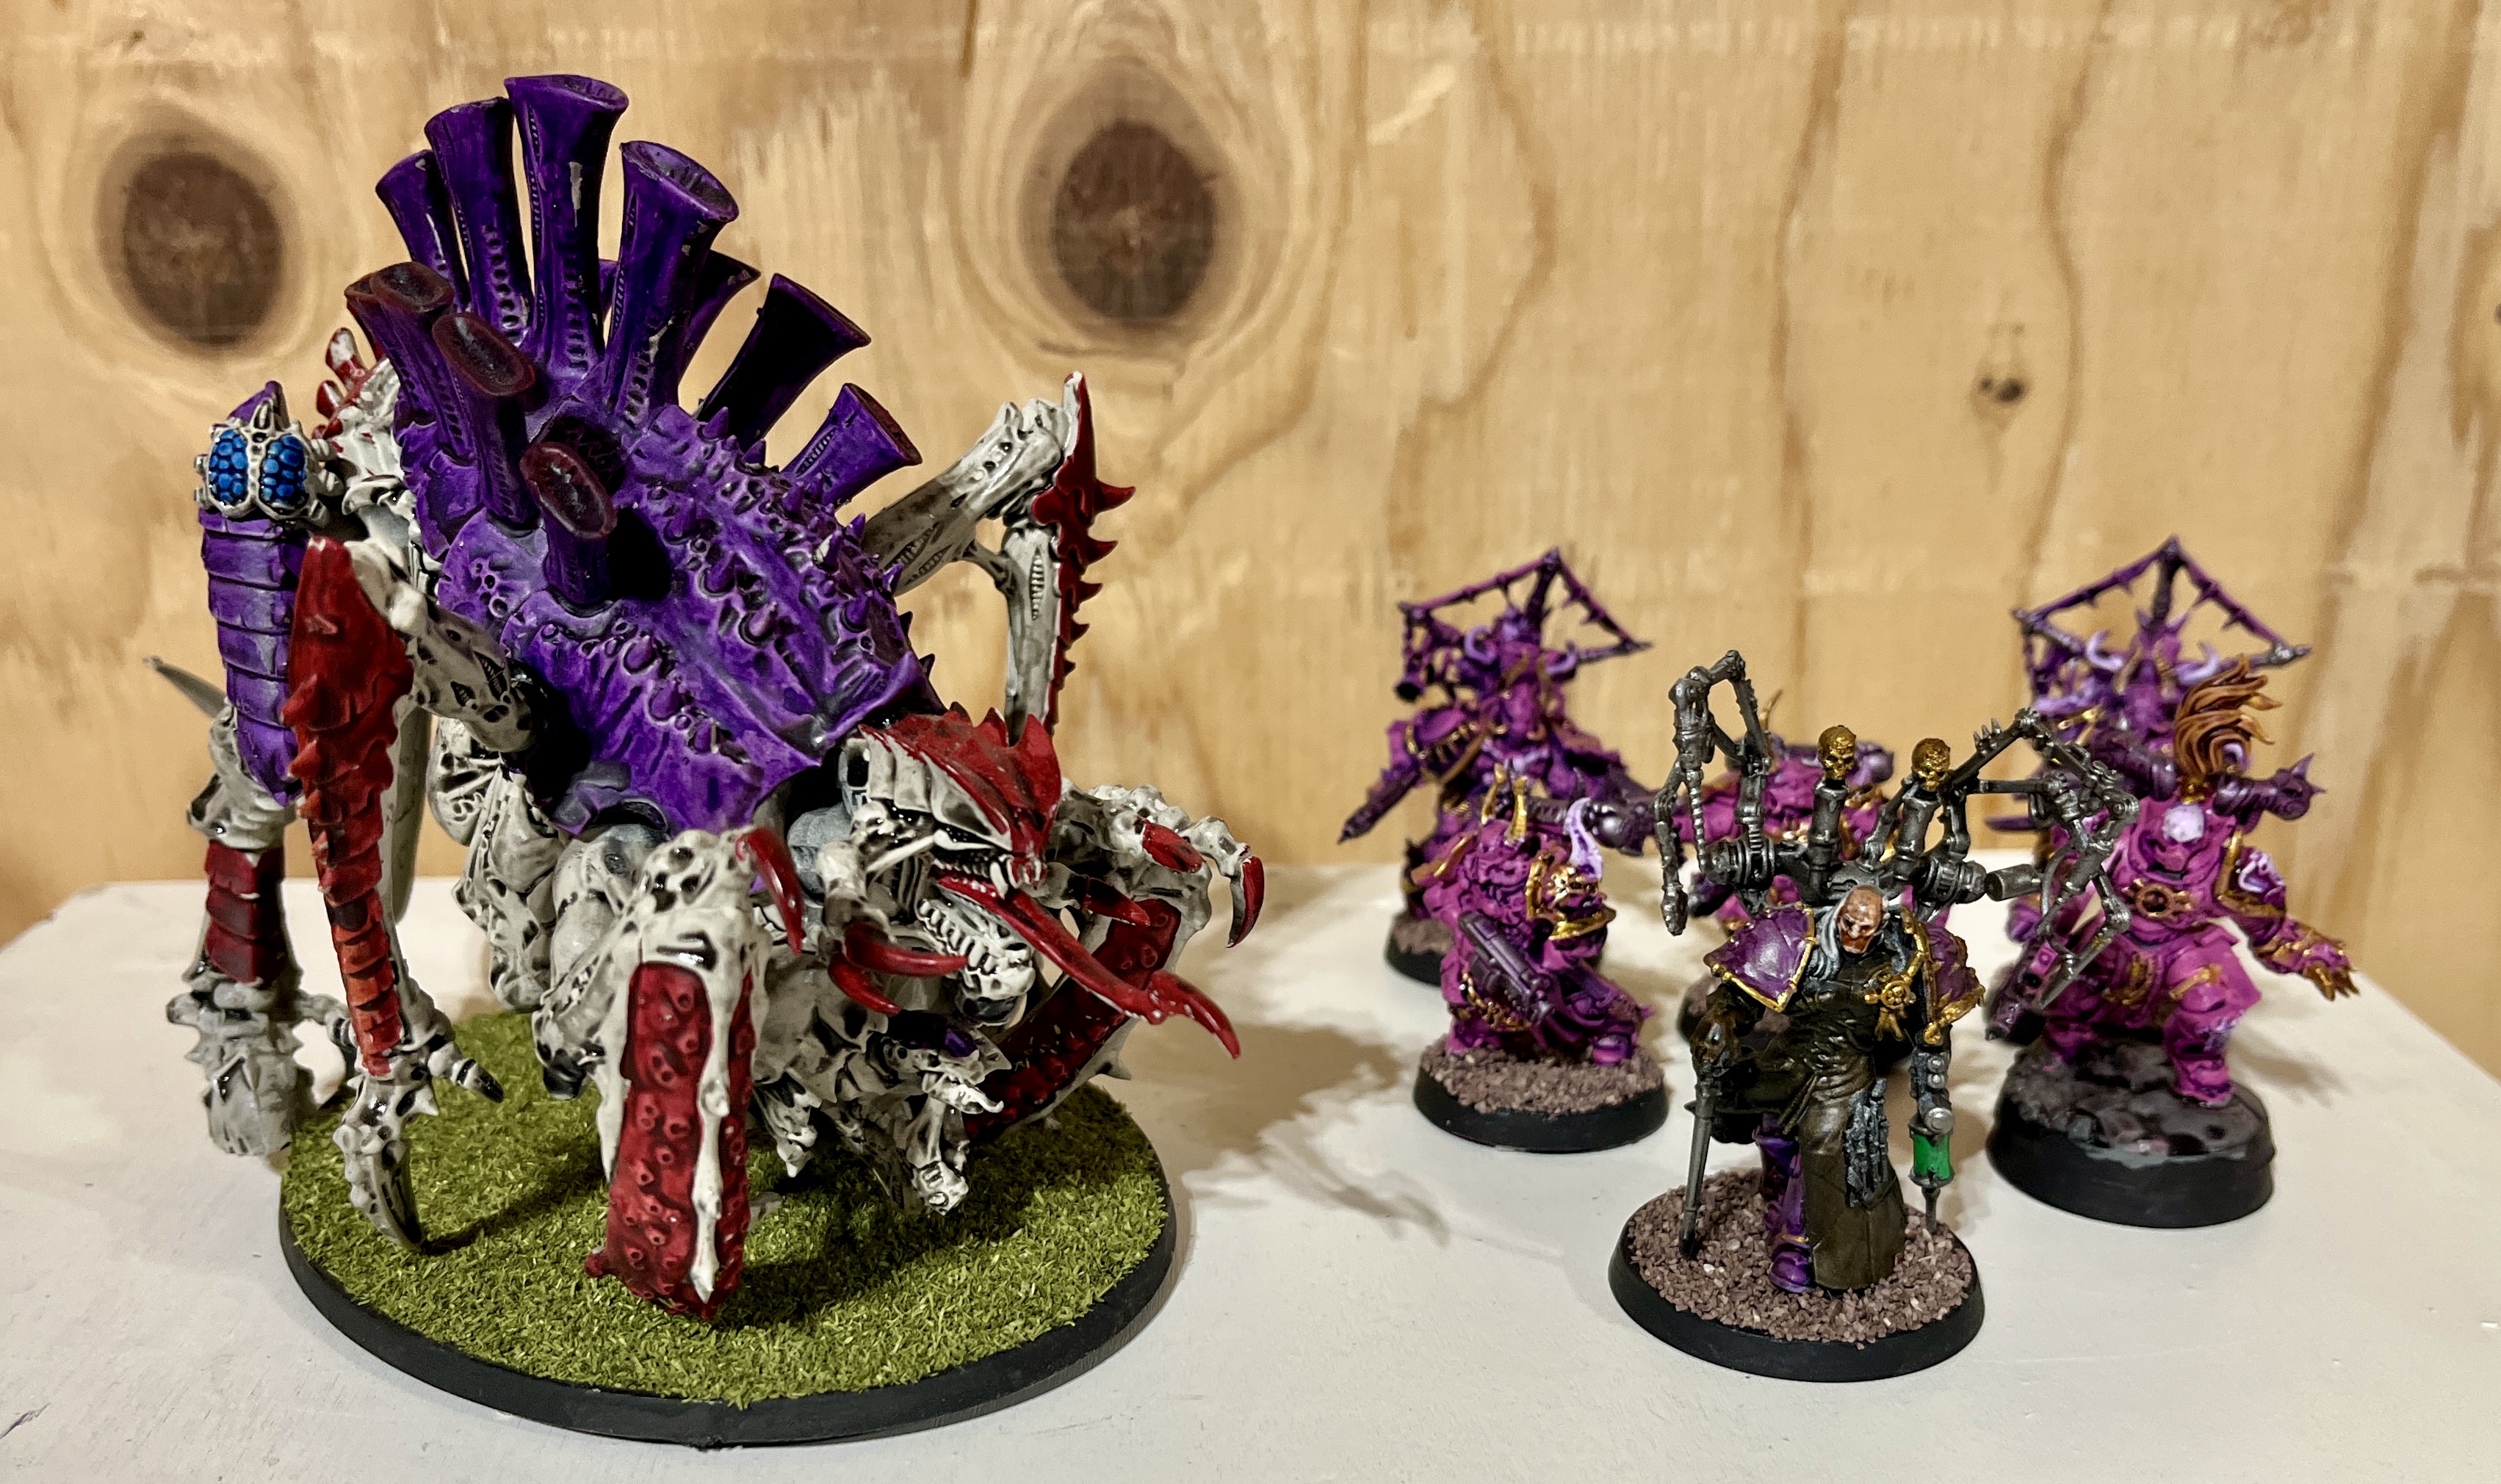
The Tyranids Invasion Fleet represents something he has hunted across countless star systems: a pure biological engine with no wasted material, no ideological constraints, no attachment to what it was yesterday. Every organism in the swarm exists to consume and improve, which makes them, in Bile’s estimation, the most scientifically honest army in the galaxy. He has not come to this battle field to destroy them. He has come to take samples. The Invasion Fleet, naturally, has other ideas.
They said we’re too old, but we said “hold our dice”…..as we see if Bile can collect the specimens that he desires or if the Tyranids can add his creations to their collection of biomass.
JUMP TO:
Chaos Space Marines Specific Strategies
RULES / POINTS VERSION:
10th Edition, 2025–2026 Chapter Approved
April 2026 Eye of Terror Update
MATCHUP:
| Faction: | Detachment: |
| Chaos Space Marines | Creations of Bile |
| VS | |
| Faction: | Detachment: |
| Tyranids | Invasion Fleet |
MISSION:
| GW Mission | G |
| Primary | Purge the Foe |
| Terrain Layout | GW Terrain Layout 7 |
| Deployment | Hammer and Anvil |
| Deployed First | Chaos Space Marines |
| First Turn | Chaos Space Marines |
LISTS:
Chaos Space Marines:
List
Chaos Space Marines
Creations of Bile
Strike Force (2,000 Points)
CHARACTERS
Chaos Lord (125 Points)
• 1x Daemon hammer
• 1x Power fist
• Enhancements: Prime Test Subject
Chaos Lord in Terminator Armour (100 Points)
• 1x Combi-bolter
• 1x Exalted weapon
• Enhancements: Living Carapace
Cypher (90 Points)
• 1x Cypher’s bolt pistol
• 1x Cypher’s plasma pistol
Fabius Bile (100 Points)
• 1x Fabius Bile
• Warlord
◦ 1x Chirurgeon
◦ 1x Rod of Torment
◦ 1x Xyclos Needler
• 1x Surgeon Acolyte
◦ 1x Surgeon Acolyte’s tools
Huron Blackheart (120 Points)
• 1x Tyrant’s Claw and exalted power weapon
• 1x Tyrant’s Claw heavy flamer
BATTLELINE
Cultist Mob (50 Points)
• 1x Cultist Champion
◦ 1x Autopistol
◦ 1x Brutal assault weapon
• 9x Chaos Cultist
◦ 9x Autopistol
◦ 9x Brutal assault weapon
Legionaries (90 Points)
• 1x Aspiring Champion
◦ 1x Chaos Icon
◦ 1x Close combat weapon
◦ 1x Heavy melee weapon
◦ 1x Plasma pistol
• 4x Legionary
◦ 2x Astartes chainsword
◦ 4x Bolt pistol
◦ 4x Close combat weapon
◦ 1x Heavy melee weapon
◦ 1x Lascannon
DEDICATED TRANSPORTS
Chaos Rhino (75 Points)
• 1x Armoured tracks
• 1x Combi-bolter
• 1x Combi-bolter
• 1x Havoc launcher
Chaos Rhino (75 Points)
• 1x Armoured tracks
• 1x Combi-bolter
• 1x Combi-bolter
• 1x Havoc launcher
Chaos Rhino (75 Points)
• 1x Armoured tracks
• 1x Combi-bolter
• 1x Combi-bolter
• 1x Havoc launcher
OTHER DATASHEETS
Chosen (250 Points)
• 1x Chosen Champion
◦ 1x Boltgun
◦ 1x Chaos Icon
◦ 1x Plasma pistol
◦ 1x Power fist
• 9x Chosen
◦ 6x Accursed weapon
◦ 6x Bolt pistol
◦ 3x Boltgun
◦ 4x Combi-weapon
◦ 2x Paired accursed weapons
◦ 3x Plasma pistol
◦ 1x Power fist
Chosen (125 Points)
• 1x Chosen Champion
◦ 1x Boltgun
◦ 1x Chaos Icon
◦ 1x Plasma pistol
◦ 1x Power fist
• 4x Chosen
◦ 3x Accursed weapon
◦ 3x Bolt pistol
◦ 1x Boltgun
◦ 2x Combi-weapon
◦ 1x Paired accursed weapons
◦ 1x Plasma pistol
Masters of the Maelstrom (115 Points)
• 1x Garreon the Corpsemaster
◦ 1x Absolvor bolt pistol
◦ 1x Reductor array
• 1x Garlon Souleater
◦ 1x Force stave
◦ 1x Mind Wrench
• 1x Katar Garrix
◦ 1x Axe of Ending
◦ 1x Bolt pistol
• 1x Captain Sargotta
◦ 1x Laspistol
◦ 1x Power sabre
• 1x The Enforcer
◦ 1x Bionic gauntlet
◦ 1x Londaxi maimer
Possessed (240 Points)
• 1x Possessed Champion
◦ 1x Hideous mutations
• 9x Possessed
◦ 1x Chaos Icon
◦ 9x Hideous mutations
Possessed (240 Points)
• 1x Possessed Champion
◦ 1x Hideous mutations
• 9x Possessed
◦ 1x Chaos Icon
◦ 9x Hideous mutations
Warp Talons (125 Points)
• 1x Warp Talon Champion
◦ 1x Warp claws
• 4x Warp Talon
◦ 4x Warp claws

Tyranids:
List
Tyranids
Invasion Fleet
Strike Force (2,000 Points)
CHARACTERS
Broodlord (80 Points)
• 1x Broodlord claws and talons
Hive Tyrant (210 Points)
• Warlord
• 1x Heavy venom cannon
• 1x Monstrous bonesword and lash whip
• Enhancements: Perfectly Adapted
Tervigon (185 Points)
• 1x Massive scything talons
• 1x Stinger salvoes
• Enhancements: Adaptive Biology
BATTLELINE
Gargoyles (85 Points)
• 10x Gargoyle
◦ 10x Blinding venom
◦ 10x Fleshborer
Termagants (120 Points)
• 20x Termagant
◦ 20x Chitinous claws and teeth
◦ 20x Fleshborer
Termagants (120 Points)
• 20x Termagant
◦ 20x Chitinous claws and teeth
◦ 20x Fleshborer
OTHER DATASHEETS
Biovores (50 Points)
• 1x Chitin-barbed limbs
• 1x Spore Mine launcher
Exocrine (140 Points)
• 1x Bio-plasmic cannon
• 1x Powerful limbs
Exocrine (140 Points)
• 1x Bio-plasmic cannon
• 1x Powerful limbs
Genestealers (140 Points)
• 10x Genestealer
◦ 10x Genestealers claws and talons
Lictor (60 Points)
• 1x Lictor claws and talons
Maleceptor (170 Points)
• 1x Massive scything talons
• 1x Psychic overload
Maleceptor (170 Points)
• 1x Massive scything talons
• 1x Psychic overload
Raveners (125 Points)
• 5x Ravener
◦ 5x Ravener claws and talons
Tyrannofex (200 Points)
• 1x Powerful limbs
• 1x Rupture cannon
• 1x Stinger salvoes

FACTION SPECIFIC STRATEGIES:
Chaos Space Marines:
Since it came out, this detachment has been one of my favorite ways to play CSM in 10th Edition. It’s not my strongest list (that would be Renegade Raiders or Chaos Cults), but it is easily the one that I have played the most and that I have the most fun with. Something about loading up on Infantry units to run at the opponent just tickles my fancy, especially when the detachment gives me a very legit incentive to run Fabius Bile, who is one of my favorite Chaos characters.
The strategy with this list is to hit the opponent with several waves of charging Infantry that is buffed up by the detachment rules. Ideally, the Warp Talons go out first to eat up the opponent’s screens and then disappear into Deep Strike. Then the Possessed move into the midfield to force the opponent to come out to play. Ideally, the Possessed can survive until Round 3, which allows me to then bring out the Chosen and Deep Strike the Warp Talons back in to finish off the opponent. Meanwhile the Rhinos and Cultists are doing actions and positioning for late game OC rushes. It doesn’t always work, especially with the Warp Talons, but when it does it feels great.
Lastly, I have adjusted this list a bit over time to update for new units that have come out and have swapped out 5 Warp Talons, 5 Chosen, and the Nemesis Claw for Huron Blackheart, the Masters of the Maelstrom, and another Rhino.
Win Condition: The Win Condition for CSM in this battle is to keep pushing forward and make sure that they are properly choosing their targets. Tyranids will offer a mix of high volume swarms and high toughness monsters and CSM will have to ensure they are putting the right units into each target. If they can’t, they risk getting tarpitted or hitting and bouncing. If they can, they should have a great game.
What I Want to Work On This Game: For this game, I want to focus on CP management. I have a tendency to “overkill” opponents in melee by investing too much CP when it is not needed because I love flashy melee combos. The goal here is to learn to be more disciplined with my CP use and melee combos so that my army doesn’t burn out too quickly.
| Category | Description |
| Leader / Bodyguard Combos: | Chaos Lord with Legionaries |
| Fabius Bile with Chosen (max sized unit) | |
| Huron Blackheart with Chosen (min sized unit with Masters of the Maelstrom) | |
| Transport / Infantry Combos: | Chaos Lord + Legionaries in Chaos Rhino |
| Fabius Bile + Chosen in Chaos Rhino | |
| Huron Blackheart + Chosen with Masters of the Maelstrom in Chaos Rhino | |
| Strategic Reserves: | Chaos Lord in Terminator Armour |
| Key Stratagems: | Specimens for the Spider [2CP] Fight phase – WHEN: Fight phase. TARGET: One Heretic Astartes Infantry unit from your army that has not been selected to fight this phase. EFFECT: Until the end of the phase, each time a model in your unit makes a melee attack that targets a Character unit, you can re-roll the Wound roll. After your unit has fought, if one or more enemy Character models were destroyed as a result of those attacks, select one enemy unit within 6″ of your unit. That enemy unit must take a Battle-shock test. If the enemy Warlord was destroyed as a result of those attacks, each enemy unit within 6″ of your unit must take a Battle-shock test instead. |
| Autostimulants [1CP] Charge phase – WHEN: Start of your Charge phase. TARGET: One Heretic Astartes Infantry unit from your army. EFFECT: Until the end of the turn, your unit is eligible to declare a charge in a turn in which it Advanced. | |
| Diabolic Regeneration [1CP] Command phase – WHEN: Your Command phase. TARGET: One Heretic Astartes Infantry unit (excluding Damned units) from your army. EFFECT: One destroyed model (excluding Character models) is returned to your unit. If your unit is a Battleline unit, D3 destroyed models (excluding Character models) are returned to your unit instead. | |
| Delayed Mutations [2CP] Command phase – WHEN: Your Command phase. TARGET: One Heretic Astartes Infantry unit (excluding Damned units) from your army. EFFECT: Your unit suffers D3 mortal wounds. Then select one augmentation (see Experimental Augmentations). Until the start of your next Command phase, models in your unit have the selected augmentation in addition to any other augmentations they have. | |
| Monstrous Visages [1CP] Opponent’s Shooting phase or Fight phase – WHEN: Your opponent’s Shooting phase or the Fight phase, just after an enemy unit has selected its targets. TARGET: One Heretic Astartes Infantry unit from your army that was selected as the target of one or more of the attacking unit’s attacks. EFFECT: Until the end of the phase, each time an attack targets your unit, subtract 1 from the Hit roll. | |
| Key Combos: | Chaos Lord + Legionaries + Dark Pacts army rule + Experimental Augmentations detachment rule + Prime Test Subject enhancement + Lord Of Chaos ability + Chance For Glory ability + Veterans Of The Long War ability + Autostimulants stratagem This combo is the reason why I play this detachment as it is the ultimate “Smash Captain”. My favorite thing to do is to Advance his unit out of a Rhino so that they can go between 10-15 inches, then use the Autostimulants stratagem to Charge into a key enemy unit and then pop all of the above abilities and enhancements. The result is a Chaos Lord with 6 attacks that gets Sustained Hits, full hit and wound re-rolls, Devastating Wounds, and Damage 4. |
| Chaos Lord in Terminator Armour + Living Carapace enhancement + Formidably Resilient ability + Monstrous Visages stratagem This guy isn’t great but it makes him sooooooo annoying to deal with. Just Deep Strike him into a corner of the Opponent’s DZ or onto an objective that they have a hard time reaching and he will be very tough to kill thanks to -1 to Hit, T5, 6 Wounds, 4+ Invulnerable Save, half all damage, and 5+ Feel No Pain. | |
| Fabius Bile + Chosen OR Huron Blackheart + Chosen + Diabolic Regeneration stratagem + Monstrous Visages stratagem This one is probably unique to this mission as it creates two Death Stars that have multiple ways to regenerate models on top of access to -1 to Hit via a stratagem and damage blanking once per turn for Bile’s unit. It should be helpful for keeping the big units up and avoiding “Kill One” or “Kill More” primary points for the Tyranids. |
Tyranids:
This list is built to create a high points floor for the user. It doesn’t do a ton of damage but has a ton of Objective Control, a massive board footprint, and lots of ways to annoy the opponent by making it significantly harder for them to kill you.
The goal with this list is to go first, plug up the midfield, get on objectives, and then to simply exist for as long as possible. The tricky part is deciding which models to lead the way with. In some matchups, you want to put the Maleceptors out first, while in others you want the Termagants to go out first. If you mess that up, you can end up move blocking yourself and creating a “bug traffic jam” but it you get it right, this list is great as a Teams Defender, especially with this mission where it can just sit on 1-2 midfield objectives and run up primary points.
The latest wrinkle is that I have swapped out the Winged Prime and Tyranid Warriors for 10 Genestealers with a Broodlord. I’m pulling in an aspect of Vanguard Onslaught that I enjoy and hoping for a faster and potentially more deadly counter charge unit out of it.
Win Condition: Tyranids’ Win Condition is simply to exist and make it very difficult for CSM to kill them. They should focus on presenting multiple targets per turn that occupy maximum board space and position their buffs in such a way that it makes it very difficult for CSM to kill entire units. Ideally, they want a low scoring game that forces CSM to win via secondaries because they aren’t earning maximum primary.
What I Want to Work On This Game: For Tyranids, I want to work on timing my defensive buffs appropriately and positioning my units to screen out massive charges from CSM. Board control and simply existing are the name of the game here and I want to stay disciplined in my focus on that.
| Category | Description |
| Leader / Bodyguard Combos: | Broodlord with Genestealers |
| Strategic Reserves: | Gargoyles |
| Key Stratagems: | Rapid Regeneration [1CP] Opponent’s Shooting phase or Fight phase – WHEN: Your opponent’s Shooting phase or the Fight phase, just after an enemy unit has selected its targets. TARGET: One Tyranids unit from your army that was selected as the target of one or more of the attacking unit’s attacks. EFFECT: Until the end of the phase, models in your unit have the Feel No Pain 6+ ability. If your unit is within Synapse Range of your army, models in your unit have the Feel No Pain 5+ ability instead. |
| Adrenal Surge [2CP] Fight phase – WHEN: Fight phase. TARGET: Up to two Tyranids units from your army that are within Synapse Range of your army and are eligible to fight, or one other Tyranids unit from your army that is eligible to fight. EFFECT: Until the end of the phase, each time a model in any of those selected units makes an attack, an unmodified Hit roll of 5+ scores a Critical Hit. | |
| Overrun [1CP] Fight phase – WHEN: Fight phase, just before a Tyranids unit from your army Consolidates. TARGET: That Tyranids unit. EFFECT: Until the end of the phase, each time your unit Consolidates, models in it can move an additional 3″ as long as your unit can end that move within Engagement Range of one or more enemy units. If your unit is within Synapse Range of your army and not within Engagement Range of any enemy units, instead of making that Consolidation move, it can make a Normal move of up to 6″. | |
| Endless Swarm [1CP] Command phase – WHEN: Your Command phase. TARGET: Up to two Endless Multitude units from your army that are within Synapse Range of your army, or one other Endless Multitude unit from your army. EFFECT: You can return up to D3+3 destroyed models to each of those selected units. | |
| Key Combos: | Tervigon + Termagants + Spawn Termagants ability + Skulking Horrors ability + Rapid Regeneration stratagem + Endless Swarm stratagem This combo is used to make Necrons players insanely jealous as it gives you a battle line unit that has a built in Reactive Move that can access a 5+ Feel No Pain and then regenerate multiple ways during the Command Phase. Even better, all of that regeneration occurs prior to scoring primary so you can use it to steal away objectives from the opponent. |
| Hive Tyrant + Termagants + Will Of The Hive Mind ability + Rapid Regeneration stratagem + Endless Swarm stratagem Add this one to the prior combo and it becomes borderline obnoxious as it gives you the ability to do all of that regeneration for -1 CP cost due to a nearby Hive Tyrant. | |
| Broodlord + Genestealers + Synapse army rule + Hyper-adaptations detachment rule + Vicious Insight ability + Vanguard Predator ability + Adrenal Surge stratagem + Overrun stratagem This is a new add to this list and I am hoping that it will be a lethal one. It is used to buff up the Genestealers to be a vicious counter charge unit as it gives them access to Sustained or Lethal (Sustained in this matchup), Critical Hits on 5’s, re-rolls of 1’s to Hit (and to Wound if the target is on an Objective), with Devastating Wounds. Thats a lot of damage output and it gets even better if you can get the Hive Tyrant within 6 inches to provide Lethal Hits as well. |
ROUND-BY-ROUND RECAP:
CSM deploys fairly aggressively as there is a decent amount of cover for them to hide behind. They position the Possessed units to pressure the two side objectives, Huron’s Rhino and the Warp Talons to pressure the middle, and the other Rhinos to backup the Possessed as a second wave. Ideally, they want to go first so they can stage up and position for a second Round push to keep the Tyranids bottled up behind terrain.
The Tyranids also deploy fairly aggressively. In this case, they decide the best play is to put the Termagants out first to screen with the big bugs following behind. The goal is to use the Termagants and their Objective Control to get CSM to expose their max sized units to all of the Tyranids Blast and Damage 3 weapons. Tyranids are OK going either first or second as they have selected Sustained Hits against Infantry units as their Hyper-Adaption and they are facing an enemy that is almost entirely Infantry based.
The board state after Deployment is shown below.

Post Deployment
CSM wins the roll off and will go first. Broodlord + Genestealers Scout Moves back into Tyranids Deployment Zone to Hide
Board state at the start of the battle is shown below.

Start of the Battle
ROUND 1:
| Phase: | Go First: Chaos Space Marines |
| Score at Start | 10 |
| CP at Start | 1 |
| Command | [Chaos Space Marines] Fabius Bile uses Experimental Augmentations detachment rule and get +1 to Toughness and +1 to Melee Weapon Strength [Chaos Space Marines] Draw Secondaries: Engage On All Fronts & Cleanse [Chaos Space Marines] Cultist Mob uses For the Dark Gods to sticky Objective 2 |
| Movement | [Chaos Space Marines] Possessed 1 Makes a Normal Move onto Objective 5 to Cleanse [Chaos Space Marines] Possessed 2 Makes a Normal Move onto Objective 3 to Cleanse [Chaos Space Marines] Chaos Rhino 1 Makes a Normal Move towards No Man’s Land to Stage [Chaos Space Marines] Chaos Rhino 2 Makes a Normal Move towards No Man’s Land to Stage [Chaos Space Marines] Cypher Makes a Normal Move towards Objective 3 to Vect the midfield [Chaos Space Marines] Warp Talons Makes a Normal Move further back in the CSM Deployment Zone to Screen |
| Shooting | [Chaos Space Marines] Possessed 1 Performs Cleanse [Chaos Space Marines] Possessed 2 Performs Cleanse |
| Charge | [Chaos Space Marines] None |
| Fight | [Chaos Space Marines] None |
| End of Turn | [Chaos Space Marines] Scores Secondary: Cleanse — 5 VP [Chaos Space Marines] Scores Secondary: Engage On All Fronts — 1 VP |
| Score at End | 16 |
| CP at End | 1 |
A boring but good turn for CSM as they get to do what they wanted to do anyways (stage their Possessed on the side Objectives) and get points for it. They are now decently positioned for a push turn in Round 2.
Meanwhile Tyranids are looking forward to getting a chance to draw first blood as CSM didn’t make any meaningful unit activations in this turn.
Board state in the middle of Round 1 is shown below.

Middle of Round 1
| Phase: | Go Second: Tyranids |
| Score at Start | 10 |
| CP at Start | 2 |
| Command | [Tyranids] Draw Secondaries: Engage On All Fronts & Assassination |
| Movement | [Tyranids] Termagants 1 Advances onto Objective 4 [Tyranids] Termagants 2 Advances onto Objective 3 [Tyranids] Tervigon Makes a Normal Move towards No Man’s Land to Stage and support Termagants [Tyranids] Hive Tyrant Makes a Normal Move towards No Man’s Land to Stage and support Termagants [Tyranids] Maleceptor 1 Makes a Normal Move towards Objective 5 to Stage [Tyranids] Maleceptor 2 Makes a Normal Move towards No Man’s Land to Stage [Tyranids] Exocrine 1 Makes a Normal Move towards No Man’s Land to Shoot [Tyranids] Exocrine 2 Makes a Normal Move towards No Man’s Land to Shoot [Tyranids] Tyrannofex Makes a Normal Move towards No Man’s Land to Shoot |
| Shooting | [Tyranids] Exocrine 1 Shoots Possessed 1 and Kills 3 models [Tyranids] Tyrannofex Shoots Possessed 1 and Kills 1 model [Tyranids] Termagants 1 Shoots Possessed 1 and Deals 1 Damage |
| Charge | [Tyranids] None |
| Fight | [Tyranids] None |
| End of Turn | [Tyranids] Scores Secondary: Engage On All Fronts — 1 VP [Tyranids] Drops Secondary: Assassination for 1 CP |
| Score at End | 11 |
| CP at End | 3 |
Another relatively boring turn. In this case the Tyranids get their screens deployed and do some chip Damage to the first Possessed unit, but otherwise don’t do much other than positioning for future turns. They also did not draw the greatest Secondaries, so are behind on points but ahead on CP.
Board state at the end of Round 1 is shown below.

End of Round 1
ROUND 2:
| Phase: | Go First: Chaos Space Marines |
| Score at Start | 16 |
| CP at Start | 3 |
| Command | [Chaos Space Marines] Draw Secondaries: Marked For Death & Area Denial [Tyranids] Mark Tervigon, Hive Tyrant, and Raveners [Chaos Space Marines] Mark Lictor [Chaos Space Marines] Score Primary: 4 VP for Hold One |
| Movement | [Chaos Space Marines] Possessed Makes a Normal Move towards Lictor to Charge [Chaos Space Marines] Huron Blackheart + Chosen with Masters of the Maelstrom Disembarks from Chaos Rhino 2 onto Objective 4 to Shoot and Charge [Tyranids] Termagants 1 uses Skulking Horrors ability to Reactive Move out of Cypher’s Vect aura [Chaos Space Marines] Possessed 2 Makes a Normal Move towards Termagants 2 to Charge [Tyranids] Termagants 2 uses Skulking Horrors ability to Reactive Move away [Chaos Space Marines] Chaos Rhino 1 Makes a Normal Move towards No Man’s Land to Stage [Chaos Space Marines] Chaos Rhino 3 Makes a Normal Move towards No Man’s Land to Stage [Chaos Space Marines] Chaos Rhino 2 Advances towards Objective 3 to Hide |
| Shooting | [Chaos Space Marines] Huron Blackheart + Chosen with Masters of the Maelstrom uses Dark Pacts for Sustained to Shoot Termagants 1 and Kill 14 models |
| Charge | [Chaos Space Marines] Possessed 1 Declares a Charge into Lictor — Charge Succeeded [Chaos Space Marines] Huron Blackheart + Chosen with Masters of the Maelstrom Declares a Charge into Termagants 1 — Charge Succeeded [Chaos Space Marines] Possessed 2 Declares a Charge into Termagants 2 — Charge Succeeded |
| Fight | [Tyranids] Lictor Fights Possessed 1 and Kills 1 model [Tyranids] Hive Tyrant uses Will of the Hive Mind ability to use Rapid Regeneration stratagem on Termagants 2 for 1 CP thanks to Cypher’s Vect aura [Chaos Space Marines] Possessed 2 uses Dark Pacts for Sustained to Fight Termagants 2 and Destroys the Unit [Chaos Space Marines] Huron Blackheart + Chosen with Masters of the Maelstrom Fights Termagants 1 and Destroys the Unit [Chaos Space Marines] Possessed 1 uses Dark Pacts to Fight Lictor and Destroys the Unit [Chaos Space Marines] Possessed 1 Consolidates into Maleceptor 1 [Tyranids] Maleceptor 1 Fights Possessed 1 and Kills 1 model |
| End of Turn | [Chaos Space Marines] Scores Secondary: Marked For Death — 2 VP [Chaos Space Marines] Scores Secondary: Area Denial — 5 VP [Chaos Space Marines] Scores Primary: 4 VP for Kill One [Tyranids] Raveners uses Death From Below ability to go into Reserves |
| Score at End | 31 |
| CP at End | 3 |
Finally some action as CSM lands all of their Charges and blow the Tyranids screens off of the board. That turn went way better for CSM than both players expected thanks to Huron’s unit rolling hot during the Shooting Phase and Possessed 2 rolling hot during the Fight Phase.
As a result both factions are feeling a little bit at a loss. CSM is feeling at a loss because they did too well and have 3 units of 3 Wound models exposed to a whole lot of Damage 3 Blast weapons. Meanwhile, the Tyranids have lost all of their Termagants about a Round earlier than expected and are now significantly lacking in units that they want to have standing on Objectives. It will be interesting to see how this game plays out.
Board state in the middle of Round 2 is shown below.

Middle of Round 2
| Phase: | Go Second: Tyranids |
| Score at Start | 11 |
| CP at Start | 4 |
| Command | [Tyranids] Draw Secondaries: Storm Hostile Objective & Establish Locus [Tyranids] Score Primary: 4 VP for Hold One |
| Movement | [Tyranids] Maleceptor 1 Falls Back onto Objective 5 [Tyranids] Maleceptor 2 Makes a Normal Move towards Huron Blackheart + Chosen with Masters of the Maelstrom to Shoot and Charge [Chaos Space Marines] Huron Blackheart + Chosen with Masters of the Maelstrom uses Hamadrya’s Knowledge ability to Reactive Move towards Possessed 2 [Tyranids] Tervigon Makes a Normal Move towards Possessed 2 to Shoot [Tyranids] Broodlord + Genestealers Makes a Normal Move towards Possessed 1 to Charge [Tyranids] Exocrine 2 Makes a Normal Move towards Objective 4 to Shoot [Tyranids] Hive Tyrant Makes a Normal Move towards Huron Blackheart + Chosen with Masters of the Maelstrom to Shoot and Charge [Tyranids] Gargoyles Deep Strikes into CSM’s Deployment Zone to Establish Locus [Tyranids] Raveners Deep Strikes into Tyranids’ Deployment Zone to Screen |
| Shooting | [Tyranids] Gargoyles Performs Establish Locus [Chaos Space Marines] Huron Blackheart + Chosen with Masters of the Maelstrom uses Monstrous Visages stratagem [Tyranids] Exocrine 2 Shoots Fabius Bile + Chosen with Masters of the Maelstrom and Deals 0 Damage [Tyranids] Exocrine 1 Shoots Huron Blackheart + Chosen with Masters of the Maelstrom and Kills 3 models [Tyranids] Maleceptor 2 Shoots Huron Blackheart + Chosen with Masters of the Maelstrom and Kills 3 models [Tyranids] Hive Tyrant Shoots Huron Blackheart + Chosen with Masters of the Maelstrom and Deals 0 Damage [Tyranids] Tervigon Shoots Huron Blackheart + Chosen with Masters of the Maelstrom and Deals 0 Damage [Tyranids] Tyrannofex Shoots Huron Blackheart + Chosen with Masters of the Maelstrom and Kills 2 models |
| Charge | [Tyranids] Broodlord + Genestealers Declares a Charge into Possessed 1 — Charge Succeeded [Tyranids] Hive Tyrant Declares a Charge into Huron Blackheart + Chosen with Masters of the Maelstrom and has to use a 2 CP re-roll thanks to Cypher— Charge Succeeded [Chaos Space Marines] Possessed 1 uses Heroic Intervention stratagem to Charge into Hive Tyrant |
| Fight | [Chaos Space Marines] Huron Blackheart + Chosen with Masters of the Maelstrom uses Monstrous Visages stratagem [Tyranids] Hive Tyrant Fights Huron Blackheart + Chosen with Masters of the Maelstrom and Kills Masters of the Maelstrom and Chosen, but leaves Huron on 2 Wounds [Tyranids] Broodlord + Genestealers Fights Possessed 1 and Destroys the Unit [Chaos Space Marines] Possessed 2 uses Dark Pacts for Sustained and Unholy Bloodshed ability for Devastating Wounds to Fight Hive Tyrant and Deals 6 Damage |
| End of Turn | [Tyranids] Scores Secondary: Storm Hostile Objective — 4 VP [Tyranids] Scores Secondary: Establish Locus — 4 VP [Tyranids] Scores Primary: 4 VP for Kill One |
| Score at End | 27 |
| CP at End | 2 |
Hmmmm. Another turn where I don’t think either side is totally happy. In this case, the Tyranids are VERY annoyed that Huron Blackheart is still alive and therefore denied them 4 VP for Kill more on primary. They also are getting concerned at the way that Cypher’s Vect aura is impacting their CP economy. That said, they are very ahead in terms of units left on the board.
From a CSM perspective, they just saw 500 points worth of their two biggest units go down and are starting to get concerned that they pushed too early and may have exposed themselves for bad trades.
Board state at the end of Round 2 is shown below.

End of Round 2
ROUND 3:
| Phase: | Go First: Chaos Space Marines |
| Score at Start | 31 |
| CP at Start | 2 |
| Command | [Chaos Space Marines] Draw Secondaries: Establish Locus & Extend Battle Lines [Chaos Space Marines] Huron Blackheart passes Battle Shock [Chaos Space Marines] Score Primary: 4 VP for Hold One |
| Movement | [Chaos Space Marines] Chaos Rhino 1 Advances onto Objective 4 [Chaos Space Marines] Chaos Rhino 2 Makes a Normal Move onto Objective 4 [Chaos Space Marines] Chaos Rhino 3 Makes a Normal Move onto Objective 5 [Chaos Space Marines] Cypher Makes a Normal Move towards Objective 4 to Shoot [Chaos Space Marines] Warp Talons Makes a Normal Move towards No Man’s Land to Stage [Chaos Space Marines] Huron Blackheart Falls Back towards Rhino 2 and Embarks in it [Chaos Space Marines] Chaos Lord in Terminator Armour Deep Strikes into Tyranids’ Deployment Zone to Establish Locus |
| Shooting | [Chaos Space Marines] Chaos Lord in Terminator Armour Performs Establish Locus [Chaos Space Marines] Cypher Dark Pacts for Lethal to Shoot Hive Tyrant and Deals 1 Damage [Chaos Space Marines] Chaos Rhino 2 Dark Pacts for Lethal to Shoot Hive Tyrant and Deals 1 Damage |
| Charge | [Chaos Space Marines] None |
| Fight | [Chaos Space Marines] Possessed 2 uses Masters Are Watching stratagem for 4+ Fight on Death [Tyranids] Hive Tyrant Fights Possessed 2 and Kills 4 models, 2 of which can Fight on Death [Tyranids] Hive Tyrant uses Rapid Regeneration stratagem for 1 CP due to Will of the Hive Mind ability and Cypher’s Vect aura [Chaos Space Marines] Possessed 2 uses Dark Pacts for Lethal to Fight Hive Tyrant and Destroys the Unit [Chaos Space Marines] Possessed 2 Consolidates onto Objective 4 |
| End of Turn | [Chaos Space Marines] Scores Secondary: Establish Locus — 4 VP [Chaos Space Marines] Scores Secondary: Extend Battle Lines — 4 VP [Chaos Space Marines] Scores Primary: 4 VP for Kill One [Tyranids] Raveners uses Death From Below ability to go into Reserves |
| Score at End | 47 |
| CP at End | 1 |
Huh. Now that was a weird strategic wrinkle. CSM responds to having 2 of their 4 Death Stars killed by sending in the…..Rhinos?!?!
Jokes and the funny optics of this move aside, the thought from a CSM perspective is to use the Rhinos to regroup for a Round before setting up another push turn in Round 4. The idea is to force the Tyranids into a situation where they are move blocked out of the middle of the board.
Meanwhile, the Tyranids are still feeling good about being up in unit count and the fact that they will now have free access to the CSM DZ, while also being very concerned about the inefficiency of their CP economy and how bottlenecked the mid-board is.
Board state midway through Round 3 is shown below.

Middle of Round 3
| Phase: | Go Second: Tyranids |
| Score at Start | 27 |
| CP at Start | 3 |
| Command | [Tyranids] Draw Secondaries: Cleanse & Bring It Down [Tyranids] Drop Secondaries: Cleanse [Tyranids] Draw Secondaries: Extend Battle Lines [Tyranids] Score Primary: 4 VP for Hold One |
| Movement | [Tyranids] Exocrine 1 Makes a Normal Move towards No Man’s Land to Shoot [Tyranids] Maleceptor 1 Makes a Normal Move towards Objective 4 to Shoot [Tyranids] Tervigon Advances onto Objective 3 [Tyranids] Gargoyles Advances onto Objective 2 [Tyranids] Raveners Deep Strikes into CSM’s Deployment Zone |
| Shooting | [Tyranids] Exocrine 1 Shoots Chaos Rhino 1 and Deals 0 Damage [Tyranids] Tyrannofex uses a CP re-roll to Shoot Chaos Rhino 1 and Deals 0 Damage [Tyranids] Exocrine 2 Shoots Chaos Rhino 1 and Deals 0 Damage [Tyranids] Maleceptor 1 Shoots Chaos Rhino 1 and Deals 6 Damage [Tyranids] Maleceptor 2 Shoots Chaos Rhino 1 and Destroys the Unit [Tyranids] Gargoyles Shoots Cultist Mob and Kills 2 models [Tyranids] Gargoyles uses Winged Swarm to Move onto Objective 2 and out OC the Cultist Mob |
| Charge | [Tyranids] Maleceptor 2 Declares a Charge into Chaos Lord + Legionaries — Charge Succeeded [Chaos Space Marines] Possessed 2 uses Heroic Intervention stratagem to Charge Maleceptor 2 |
| Fight | [Chaos Space Marines] Chaos Lord + Legionaries uses Monstrous Visages stratagem for 0 CP due to Chaos Lord ability [Tyranids] Maleceptor 2 Fights Chaos Lord + Legionaries and Kills 1 model [Chaos Space Marines] Possessed 2 uses Dark Pacts for Lethal to Fight Maleceptor 2 and Deals 12 Damage [Chaos Space Marines] Chaos Lord + Legionaries use Dark Pacts for Lethals to Fight Maleceptor 2 and Destroys the Unit |
| End of Turn | [Tyranids] Scores Secondary: Extend Battle Lines — 4 VP [Tyranids] Scores Secondary: Bring It Down — 4 VP [Tyranids] Scores Primary: 4 VP for Kill One [Chaos Space Marines] Scores Primary: 4 VP for Kill More |
| Score at End | 43 |
| CP at End | 2 |
Ugh. That turn is right up there with the recent Necrons game that I played in terms of epic whiffs during a critical Shooting Phase. The goal going into the turn was to kill Rhinos 1 and 2 while still having enough activations left for the Maleceptors or Exocrines to get a shot or 2 off into the Legionaries that spilled out. Instead, the Tyranids were forced to Charge in and ended up dying in the crack back. Not good.
From a CSM perspective, this is exactly the kind of opportunity to re-group that they needed. They can now push a second time and, hopefully, block the Tyranids out of most of the midfield.
Board state at the end of Round 3 is shown below.

End of Round 3
ROUND 4:
| Phase: | Go First: Chaos Space Marines |
| Score at Start | 51 |
| CP at Start | 2 |
| Command | [Chaos Space Marines] Draw Secondaries: Assassination & No Prisoners [Chaos Space Marines] Score Primary: 4 VP for Hold One |
| Movement | [Chaos Space Marines] Chaos Lord + Legionaries uses Autostimulants stratagem to Advance and Charge [Chaos Space Marines] Chaos Lord + Legionaries Advances towards Broodlord + Genestealers to Charge [Chaos Space Marines] Warp Talons Makes a Normal Move towards Broodlord + Genestealers to Charge [Chaos Space Marines] Possessed 2 Makes a Normal Move towards Exocrine 2 to Charge [Chaos Space Marines] Chaos Rhino 2 Advances towards Tyranids’ Deployment Zone [Chaos Space Marines] Fabius Bile + Chosen Disembarks from Chaos Rhino 3 towards Tervigon to Charge [Chaos Space Marines] Cypher Makes a Normal Move onto Objective 4 [Chaos Space Marines] Cultist Mob Makes a Normal Move onto Objective 2 [Chaos Space Marines] Chaos Lord in Terminator Armour Makes a Normal Move towards Biovores to Shoot and Charge |
| Shooting | [Chaos Space Marines] Cultist Mob uses Grenades stratagem to kill 2 models in Gargoyles [Chaos Space Marines] Cultist Mob Shoots Gargoyles and Kills 2 models [Chaos Space Marines] Fabius Bile + Chosen Shoots Tervigon and Deals 0 Damage |
| Charge | [Chaos Space Marines] Chaos Lord + Legionaries Declares a Charge into Broodlord + Genestealers — Charge Succeeded [Chaos Space Marines] Warp Talons Declares a Charge into Broodlord + Genestealers — Charge Succeeded [Chaos Space Marines] Possessed 2 Declares a Charge into Exocrine 2 — Charge Succeeded [Chaos Space Marines] Fabius Bile + Chosen Declares a Charge into Tervigon — Charge Succeeded |
| Fight | [Chaos Space Marines] Chaos Lord + Legionaries uses Specimen for the Spider stratagem [Chaos Space Marines] Chaos Lord uses Epic Challenge stratagem [Chaos Space Marines] Chaos Lord uses Chance for Glory ability [Chaos Space Marines] Chaos Lord uses Prime Test Subject enhancement [Tyranids] Broodlord + Genestealers uses Rapid Regeneration stratagem [Chaos Space Marines] Chaos Lord + Legionaries use Dark Pacts for Sustained to Fight Broodlord + Genestealers and Kills Broodlord + 4 Genestealers [Chaos Space Marines] Warp Talons uses Dark Pacts for Sustained to Fight Genestealers and Kills 4 models [Chaos Space Marines] Possessed 2 uses Dark Pacts for Lethal to Fight Exocrine 2 and Deals 10 Damage [Chaos Space Marines] Fabius Bile + Chosen uses Dark Pacts for Lethal while taking 1 Mortal Wound due to failed Leadership Test to Fight Tervigon and Deals 4 Damage [Tyranids] Genestealers Fights Chaos Lord + Legionaries and Deals 1 Damage [Tyranids] Tervigon Fights Fabius Bile + Chosen and Deals 0 Damage [Tyranids] Exocrine 2 Fights Possessed 2 and Deals 0 Damage |
| End of Turn | [Chaos Space Marines] Scores Secondary: No Prisoners — 2 VP [Chaos Space Marines] Scores Secondary: Assassination — 5 VP [Chaos Space Marines] Scores Primary: 4 VP for Kill One |
| Score at End | 66 |
| CP at End | 0 |
And there is the next big push for CSM. They basically neuter the Genestealers, Exocrine 1, and Tervigon while taking back most of the midfield and positioning for a Round 5 Charge onto the Tyranids’ Home Objective. They are starting to feel good about this game.
From a Tyranids’ perspective, there are still options, but the path to victory is narrowing. They need another good damage turn and to draw a good batch of Secondaries to stay close on points.
Board state in the middle of Round 4 is shown below.

Middle of Round 4
| Phase: | Go Second: Tyranids |
| Score at Start | 43 |
| CP at Start | 2 |
| Command | [Tyranids] Draw Secondaries: Overwhelming Force & Area Denial [Tyranids] Drop Secondaries: Area Denial [Tyranids] Draw Secondaries: Defend Stronghold [Tyranids] Call Shadows in the Warp [Chaos Space Marines] Only Rhino 3 fails Battle Shock [Tyranids] Exocrine 2 passes Battle Shock [Tyranids] Genestealers fails Battle Shock [Tyranids] Score Primary: 4 VP |
| Movement | [Tyranids] Genestealers pass Desperate Escape to Fall Back onto Objective 5 [Tyranids] Raveners Makes a Normal Move towards Objective 2 to Charge |
| Shooting | [Tyranids] Exocrine 2 Shoots Chaos Lord + Legionaries and Kills 2 models [Tyranids] Exocrine 1 Shoots Chaos Rhino 2 and Deals 3 Damage [Tyranids] Tyrannofex Shoots Chaos Rhino 2 and Destroys the Unit [Tyranids] Tervigon Shoots Fabius Bile + Chosen and Deals 2 Damage [Tyranids] Gargoyles Shoots Cultist Mob and Kills 1 model |
| Charge | [Tyranids] Raveners Declares a Charge into Cultist Mob — Charge Succeeded |
| Fight | [Tyranids] Raveners Fights Cultist Mob and Destroys the Unit [Tyranids] Exocrine 2 uses Rapid Regeneration stratagem [Chaos Space Marines] Possessed 2 uses Dark Pacts for Lethal while suffering 2 Mortal Wounds to Fight Exocrine 2 and Deals 2 Damage [Tyranids] Tervigon Fights Fabius Bile + Chosen and Kills 1 model [Chaos Space Marines] Fabius Bile + Chosen use Dark Pacts to Fight Tervigon and Deals 2 Damage [Tyranids] Exocrine Fights Possessed 2 and Whiffs |
| End of Turn | [Tyranids] Scores Secondary: Overwhelming Force — 3 VP [Tyranids] Scores Primary: 8 VP for Kill One and Kill More [Tyranids] Drops Secondary: Defend Stronghold for 1 CP |
| Score at End | 58 |
| CP at End | 0 |
The Tyranids continue to score decent points, but I don’t think it will be enough to close the gap. They are just too stuck in the middle of the board and will most likely lose their Home Objective plus Exocrine 2 next turn.
Either way, its been a great game and lets see if CSM can bring it home. Board state at the end of Round 4 is shown below.

End of Round 4
ROUND 5:
| Phase: | Go First: Chaos Space Marines |
| Score at Start | 66 |
| CP at Start | 2 |
| Command | [Chaos Space Marines] Draw Secondaries: A Tempting Target & Sabotage [Tyranids] Pick Objective 5 as Tempting Target [Chaos Space Marines] Huron Blackheart passes Battle Shock [Chaos Space Marines] Score Primary: 4 VP for Hold One |
| Movement | [Chaos Space Marines] Warp Talons Makes a Normal Move into Tyranids’ Deployment Zone to Sabotage [Chaos Space Marines] Fabius Bile + Chosen Falls Back to Shoot and Charge [Chaos Space Marines] Huron Blackheart Makes a Normal Move towards Objective 1 to Shoot and Charge [Chaos Space Marines] Chaos Lord in Terminator Armour Makes a Normal Move towards Objective 1 to Shoot and Charge [Chaos Space Marines] Chaos Lord + Legionaries Makes a Normal Move towards Genestealers to Shoot and Charge |
| Shooting | [Chaos Space Marines] Warp Talons Performs Sabotage [Chaos Space Marines] Chaos Lord in Terminator Armour Shoots Biovores and Deals 0 Damage [Chaos Space Marines] Chaos Lord + Legionaries Shoots Genestealers and Deals 1 Damage [Chaos Space Marines] Fabius Bile + Chosen Shoots Tervigon and Deals 0 Damage |
| Charge | [Chaos Space Marines] Fabius Bile + Chosen Declares a Charge into Tervigon — Charge Succeeded [Chaos Space Marines] Chaos Lord + Legionaries Declares a Charge into Genestealers — Charge Succeeded [Chaos Space Marines] Huron Blackheart Declares a Charge into Biovores — Charge Succeeded [Chaos Space Marines] Chaos Lord in Terminator Armour Declares a Charge into Biovores — Charge Succeeded |
| Fight | [Chaos Space Marines] Chaos Lord + Legionaries Fights Genestealers and Destroys the Unit [Chaos Space Marines] Huron Blackheart Fights Biovores and Destroys the Unit [Chaos Space Marines] Fabius Bile + Chosen use Dark Pacts for Lethals to Fight Tervigon and Deals 3 Damage [Tyranids] Exocrine 2 Fights Possessed 2 and Whiffs [Chaos Space Marines] Possessed 2 use Dark Pacts for Lethals to Fight Exocrine 2 and Destroys the Unit through Rapid Regeneration stratagem |
| End of Turn | [Chaos Space Marines] Scores Secondary: A Tempting Target — 5 VP [Chaos Space Marines] Scores Primary: 4 VP for Kill One |
| Score at End | 79 |
| CP at End | 2 |
CSM finishes their game with 79 win the board, a decent board position as they control 5 Objectives, and a potential for another 10 VP coming at the end of the Tyranids’ turn. Not bad given where they felt at the end of Round 2.
Tyranids, meanwhile, are hoping for a great Secondary draw and a bit of luck. Let’s see how it ends up. Board state in the middle of Round 5 is below.

Middle of Round 5
| Phase: | Go Second: Tyranids |
| Score at Start | 58 |
| CP at Start | 2 |
| Command | [Tyranids] Draw Secondaries: Display of Might & Sabotage [Tyranids] Drop Secondaries: Display of Might [Tyranids] Draw Secondaries: Recover Assets |
| Movement | [Tyranids] Exocrine 1 Makes a Normal Move into Tyranids’ Deployment Zone |
| Shooting | [Tyranids] Tyrannofex Shoots Huron Blackheart and Destroys the Unit [Tyranids] Raveners Performs Recover Assets [Tyranids] Exocrine 1 Performs Recover Assets [Tyranids] Maleceptor 1 Performs Recover Assets [Tyranids] Gargoyles Performs Sabotage |
| Charge | [Tyranids] None |
| Fight | [Chaos Space Marines] Fabius Bile + Chosen Fights Tervigon and Whiffs [Tyranids] Tervigon Fights Fabius Bile + Chosen and Kills 1 model |
| End of Turn | [Tyranids] Scores Secondary: Sabotage — 6 VP [Tyranids] Scores Secondary: Recover Assets — 5 VP [Tyranids] Scores Primary: 8 VP for Kill One and Hold One [Chaos Space Marines] Scores Secondary: Sabotage — 6 VP [Chaos Space Marines] Scores Primary: 4 VP for Kill More |
| Score at End | 77 |
| CP at End | 1 |
And thats game. The Tyranids kept it close and almost got there, but CSM managed to just stay ahead for most of the game.
Board state at the end of the game is shown below.

End of Round 5
RESULT:
Singles Format: 89 – 77 CSM WINS
WTC Teams Format: 12-8 CSM WIN
GAME REVIEW:
This was a great back and forth game with a lot of highs and lows for both sides. Rounds 2 and 3 were especially roller coasters as both sides had moments where they were doing significant damage and others where they whiffed in key places. At the end of it, I think superior mobility and the ability to jail their opponents is what swung the game for CSM. Even then, it was close throughout and featured a lot of back and forth play, which I always enjoy.
From a CSM perspective, I’m happy with how I managed my CP economy, how Cypher was used to ruin the Tyranids CP economy, and of the mid-game adjustment to the Round 3 “Send in the Rhinos!!”. All make progress against some routine mistakes that I make with CSM and I’m happy to see that my focus on them made a difference.
From a Tyranids perspective, I always enjoy playing this list but the fact that it’s not a main list that I have a ton of reps into shows. There were micro-mistakes related to movement throughout the game and I think the ultimately swung it to CSM.
WHAT I WOULD CHANGE NEXT TIME:
- Chaos Space Marines
- I still need to figure out the Huron + Masters of the Maelstrom brick. I think I was too aggressive with it this time and it cost me that unit in Round 2. Besides that, I’m not sure as CSM scored well and maintained a lead throughout the game despite the Huron brick issues.
- Tyranids
- This is another one that I’m not sure of as I think the Tyranids played well too. They had some critical dice failures in the key Round 3, which probably contributed the most to the loss.
- Beyond that, I think the only other thing that stands out is the usage of the Broodlord + Genestealers. I’ll need to think on it, but probably could have used them in Round 3 to help counterbalance the whiff potential in the Shooting Phase.
- I also keep forgetting to use the Biovores ability to spawn Spore Mines and need to remember that for next time.
EARNED THEMSELF A NAME:
Possessed 2. They were the key unit to keeping CSM in the game thanks to some clutch Heroic Interventions, which they then cascaded into tar pitting several Tyranid monsters. This unit plus the Rhinos were really effective at jailing the Tyranids in Rounds 3 and 4.
MAGNUS OF THE GAME:
The Termagant units. They both poked their heads out and then immediately got squashed by CSM charges. I’m not sure leading with them was the wrong play, but do think that Tyranids messed up where to use Rapid Regeneration and how much to expose them.
CINEMATIC MOMENTS OF THE GAME:
None for this game. I got too into the game and forgot to take any of these pictures. Sorry.

Leave a Reply