
JUMP TO:
RULES / POINTS VERSION:
10th Edition, 2025 – 2026 Chapter Approved
December 2025 Balanced Dataslate and MFM Points Update, with February 2026 Maelstrom Update
MATCHUP:
| Faction: | Detachment: |
| Necrons | Cursed Legion |
| VS | |
| Faction: | Detachment: |
| Chaos Space Marines | Renegade Raiders |
MISSION:
| GW Mission | A |
| Primary | Take & Hold |
| Terrain Layout | GW Terrain Layout 1 |
| Deployment | Tipping Point |
LISTS:
Necrons:
List
Necrons
Cursed Legion
Strike Force (2,000 Points)
CHARACTERS
Chronomancer (80 Points)
• 1x Chronomancer’s stave
• Enhancements: Murdermind
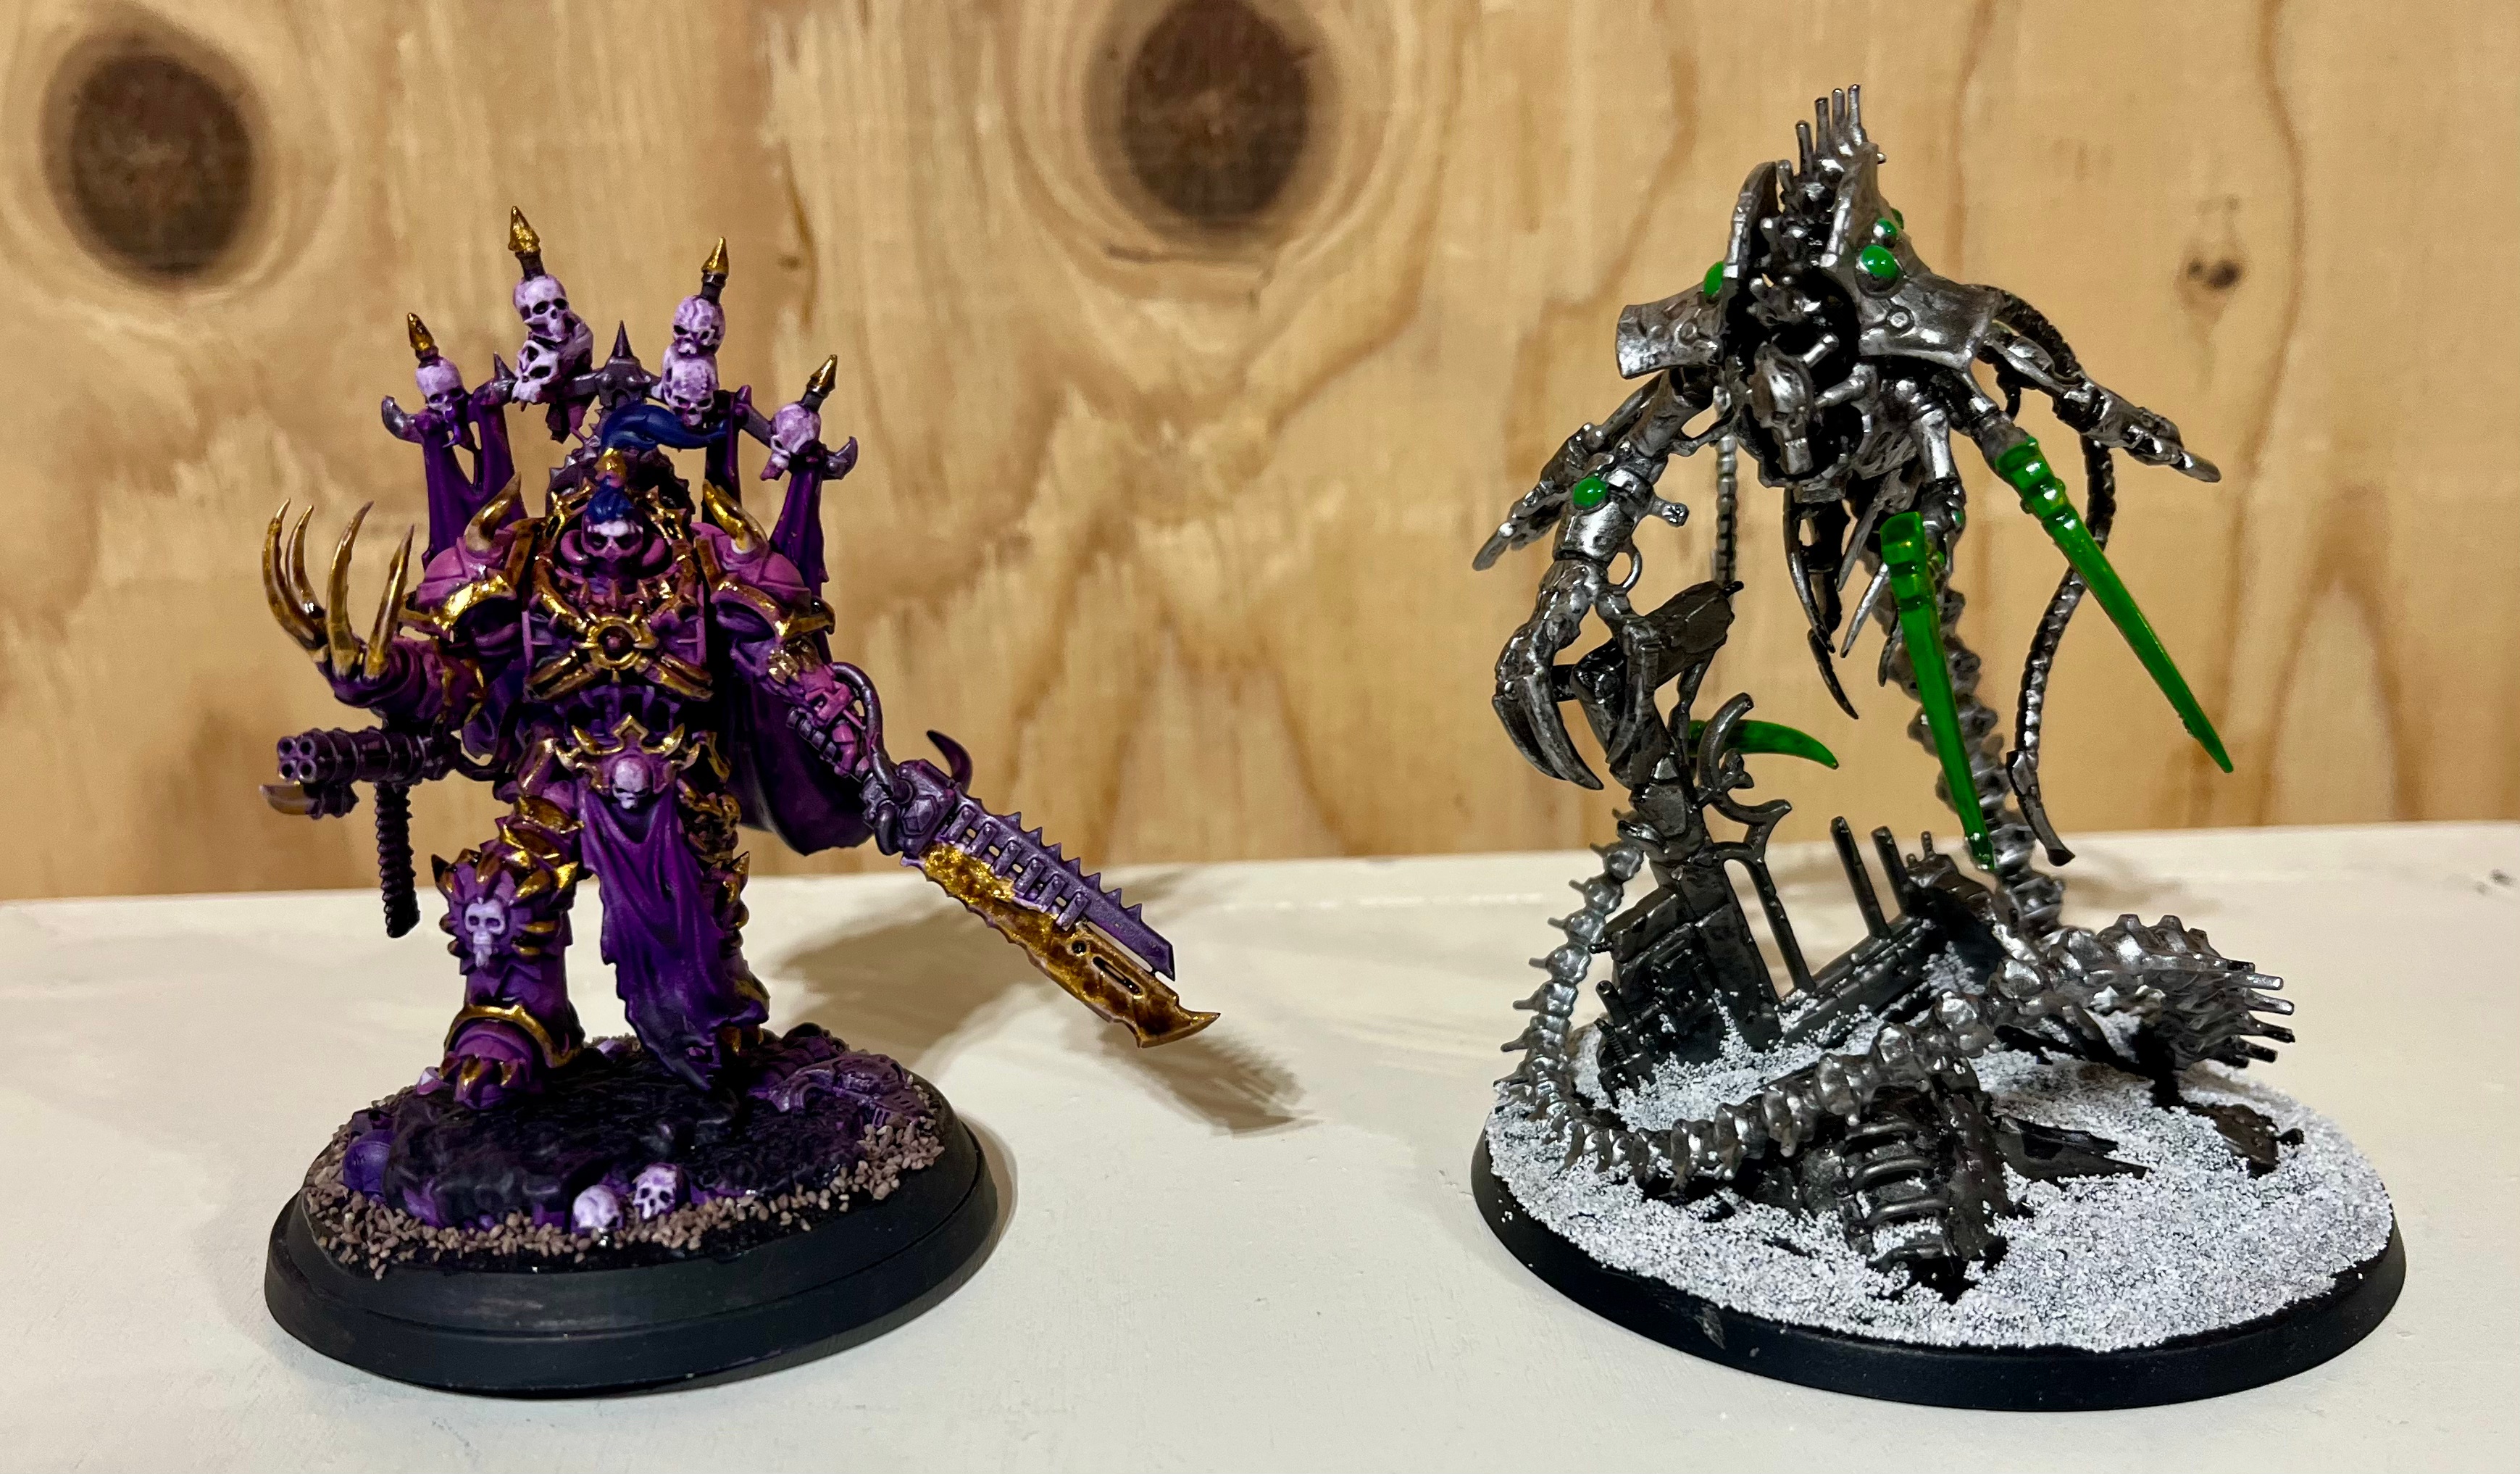
C’tan Shard of the Nightbringer (315 Points)
• 1x Gaze of death
• 1x Scythe of the Nightbringer
Hexmark Destroyer (75 Points)
• 1x Close combat weapon
• 1x Enmitic disintegrator pistols
Lokhust Lord (80 Points)
• 1x Resurrection Orb
• 1x Staff of light
Nekrosor Ammentar (165 Points)
• Warlord
• 1x Blade tail and whip coils
• 1x Enmitic disintegrators
• 1x Nullstone Field Generator (Aura)
• 1x Unmaker Gauntlet
Skorpekh Lord (90 Points)
• 1x Enmitic annihilator
• 1x Flensing claw
• 1x Hyperphase harvester
OTHER DATASHEETS
Lokhust Destroyers (180 Points)
• 6x Lokhust Destroyer
◦ 6x Close combat weapon
◦ 6x Gauss cannon
Lokhust Heavy Destroyers (165 Points)
• 3x Lokhust Heavy Destroyer
◦ 3x Close combat weapon
◦ 3x Enmitic exterminator
Lokhust Heavy Destroyers (165 Points)
• 3x Lokhust Heavy Destroyer
◦ 3x Close combat weapon
◦ 3x Gauss destructor
Lokhust Heavy Destroyers (165 Points)
• 3x Lokhust Heavy Destroyer
◦ 3x Close combat weapon
◦ 3x Gauss destructor
Ophydian Destroyers (80 Points)
• 3x Ophydian Destroyer
◦ 3x Ophydian hyperphase weapons
◦ 1x Plasmacyte
Ophydian Destroyers (80 Points)
• 3x Ophydian Destroyer
◦ 3x Ophydian hyperphase weapons
◦ 1x Plasmacyte
Skorpekh Destroyers (180 Points)
• 6x Skorpekh Destroyer
◦ 2x Plasmacyte
◦ 6x Skorpekh hyperphase weapons
Skorpekh Destroyers (90 Points)
• 3x Skorpekh Destroyer
◦ 1x Plasmacyte
◦ 3x Skorpekh hyperphase weapons
Skorpekh Destroyers (90 Points)
• 3x Skorpekh Destroyer
◦ 1x Plasmacyte
◦ 3x Skorpekh hyperphase weapons

CSM:
List
Chaos Space Marines
Renegade Raiders
Strike Force (2,000 Points)
CHARACTERS
Abaddon the Despoiler (270 Points)
• Warlord
• 1x Drach’nyen
• 1x Talon of Horus
Chaos Lord (90 Points)
• 1x Daemon hammer
• 1x Plasma pistol
Fabius Bile (100 Points)
• 1x Fabius Bile
◦ 1x Chirurgeon
◦ 1x Rod of Torment
◦ 1x Xyclos Needler
• 1x Surgeon Acolyte
◦ 1x Surgeon Acolyte’s tools
Lord Discordant on Helstalker (185 Points)
• 1x Bladed limbs
• 1x Bolt Pistol
• 1x Helstalker autocannon
• 1x Impaler chainglaive
• 1x Techno-virus injector
• Enhancements: Mark of the Hound
BATTLELINE
Cultist Mob (50 Points)
• 1x Cultist Champion
◦ 1x Autopistol
◦ 1x Brutal assault weapon
• 9x Chaos Cultist
◦ 9x Autopistol
◦ 9x Brutal assault weapon
Legionaries (90 Points)
• 1x Aspiring Champion
◦ 1x Chaos Icon
◦ 1x Close combat weapon
◦ 1x Heavy melee weapon
◦ 1x Plasma pistol
• 4x Legionary
◦ 2x Astartes chainsword
◦ 4x Bolt pistol
◦ 4x Close combat weapon
◦ 1x Heavy melee weapon
◦ 1x Lascannon
DEDICATED TRANSPORTS
Chaos Rhino (75 Points)
• 1x Armoured tracks
• 1x Combi-bolter
• 1x Combi-bolter
• 1x Havoc launcher
Chaos Rhino (75 Points)
• 1x Armoured tracks
• 1x Combi-bolter
• 1x Combi-bolter
• 1x Havoc launcher
OTHER DATASHEETS
Chaos Bikers (70 Points)
• 1x Biker Champion
◦ 1x Chaos Icon
◦ 1x Close combat weapon
◦ 1x Combi-bolter
◦ 1x Power fist
• 2x Chaos Biker
◦ 2x Astartes chainsword
◦ 2x Close combat weapon
◦ 2x Combi-bolter
◦ 2x Meltagun
Chaos Vindicator (185 Points)
• 1x Armoured tracks
• 1x Combi-bolter
• 1x Demolisher cannon
• 1x Havoc launcher
Chaos Vindicator (185 Points)
• 1x Armoured tracks
• 1x Combi-bolter
• 1x Demolisher cannon
• 1x Havoc launcher
Chosen (125 Points)
• 1x Chosen Champion
◦ 1x Boltgun
◦ 1x Chaos Icon
◦ 1x Plasma pistol
◦ 1x Power fist
• 4x Chosen
◦ 3x Accursed weapon
◦ 3x Bolt pistol
◦ 1x Boltgun
◦ 2x Combi-weapon
◦ 1x Paired accursed weapons
◦ 1x Plasma pistol
Chosen (250 Points)
• 1x Chosen Champion
◦ 1x Boltgun
◦ 1x Chaos Icon
◦ 1x Plasma pistol
◦ 1x Power fist
• 9x Chosen
◦ 6x Accursed weapon
◦ 8x Bolt pistol
◦ 3x Boltgun
◦ 4x Combi-weapon
◦ 2x Paired accursed weapons
◦ 1x Plasma pistol
◦ 1x Power fist
Chosen (125 Points)
• 1x Chosen Champion
◦ 1x Boltgun
◦ 1x Chaos Icon
◦ 1x Plasma pistol
◦ 1x Power fist
• 4x Chosen
◦ 3x Accursed weapon
◦ 3x Bolt pistol
◦ 1x Boltgun
◦ 2x Combi-weapon
◦ 1x Paired accursed weapons
◦ 1x Plasma pistol
Warp Talons (125 Points)
• 1x Warp Talon Champion
◦ 1x Warp claws
• 4x Warp Talon
◦ 4x Warp claws

FACTION SPECIFIC STRATEGIES:
Necrons:
This is my first go at the Cursed Legion for Necrons and I am excited to try it, as the Destroyers are my favorite part of Necrons. For this list, I am packing in as many Destroyer models as possible, as well as my new C’Tan Shard of the Nightbringer.
The idea behind the list is to lean in on the shooting side of Destroyers since that seems to be what the army’s stratagems buff the best. I have 3 full sized units of Lokhust Heavy Destroyers (LDH’s), a max sized unit of Lokhust Destroyers, and then a Lokhust Lord and Chronomancer to lead them. The idea is to mix and match what Lokhust units the Lord and Chronomancer lead depending on the matchup to maximize shooting lethality.
The Skorpekhs are then there to skirmish for objectives in the midfield, with the Nightbringer as my “Distraction Carnifex” that I shove through the middle to scare the opponent. Lastly, the Hexmark and Ophydians are there to do actions and score points.
The only one that I still need to define a role for is the Nekrosor. On one hand, he is a great buff piece for giving Sustained Hits to my ranged shooting. On the other hand, he is also a great counter charge and Heroic Intervention threat for the Skorpekhs due to his Fights First. I think I will start with him buffing the shooting and then coming out to the midfield mid to late game, but we’ll see if that sticks as it tends to be too passive for my tastes.
Win Condition: The plan is to play a “tempo and trade” type of game with the Necrons. I’ll use the 3 model Skorpekhs to try to hold my own Natural Expansion Objective, while using the max sized Skorpekh Destroyers to counter attack anything that tries to take it from them, and the C’Tan will drive right down Main Street to try to bait out the Vindicators and Abaddon so that the Lokhust units can shoot and kill them. The goal is to bleed CSM of anything that can kill the C’Tan or the Nekrosor and then use those two plus all of the Lokhust guns to sweep the board clean.
What I Want to Work On This Game: Defining how the Nekrosor fits into the list. Having a unit that can do multiple roles well is definitely “first world problems” but I want to make sure I clearly define a role for him by the end of this game so that I can play this list better in future iterations.
| Category | Description |
| Warlord | Nekrosor Ammentar |
| Leader / Bodyguard Combos: | Lokhust Lord with 3 x Gauss Destructor Lokhust Heavy Destroyers |
| Skorpekh Lord with 3 x Skorpekh Destroyers | |
| Chronomancer with 3 x Gauss Destructor Lokhust Heavy Destroyers | |
| Transport / Infantry Combos: | N/A |
| Strategic Reserves: | Lokhust Destroyers |
| Key Strategems: | Driven to Butchery – Used in your Shooting or Charge Phase to give one unit the ability to Shoot and Charge in a turn in which it Advanced. Note: this can only be used once per turn. |
| Image of Death – Used in your opponent’s Shooting or Fight Phase to subtract 1 from the opponent’s Hit roll when attacking one Destroyer Cult unit. | |
| Methodical Murder – Used in your Shooting or Fight Phase to give one Necrons unit, excluding Monsters or Vehicles, Sustained Hits 1. | |
| Mortis Protocols – Used in your Shooting or Fight Phase after a Destroyer Cult unit destroys an enemy unit to active Reanimation Protocols on a friendly Necrons unit, excluding Monster or Vehicle, within 9 inches of the Destroyer Cult unit. | |
| Key Combos: | Chronomancer + Mudermind enhancement + Timesplitter Mantle ability + Chronometron ability + Lokhust Heavy Destroyers with Gauss Exterminators + Optimized For Slaughter ability + Methodical Murder stratagem or nearby Nekrosor Ammentar This is used to give your Lokhust Heavy Destroyers Sustained and Lethal Hits into Monsters and Vehicles, with re-rolls of 1 to wound, and a built in -1 to hit in return. They also get to “move shoot move” and potential access to Advance + Shoot with Driven to Butchery. This should make it hard for the CSM vehicles to hide from them or kill them before they get their shots off. |
| Lokhust Lord + Destroyer Cult ability + Driven By Hatred ability + Lokhust Heavy Destroyers with Gauss Exterminators + Optimized For Slaughter ability + Methodical Murder stratagem or nearby Nekrosor Ammentar Similar to the above combo, this one is a unit that has access to Sustained and Lethal with Critical Hits on 5+, re-rolls of 1 to wound into Monsters/Vehicles, and re-rolls to Hit and Wound if the target is below Half Strength. They also can add in Driven to Butchery and/or Image of Death for Assault and/ or -1 to Hit. |
CSM:
This is one of my favorite detachments to play and I probably have more reps into it than anything else in the game at this point. If you haven’t figured out by now, I like to go fast and hit hard when I play 40K and that is exactly what this list does. It is built around moving the Vindicators around to spam out shooting in the early game, which is combined with waves of Chosen charging out of Rhinos and Warp Talons flying around the board to blow up enemy units that dare to stand on Objectives. The Legionaries are there as a potential third wave of charges or as a late game Objective Control piece, which is what the Cultists are as well. Lastly, the Bikers are there to hold down an Objective and do actions.
Most of all, I love this detachment’s movement abilities. I am always looking to use the detachments movement shenanigans to start cycling my Warp Talons in and out of Deep Strike or the Chosen units in and out of Transports via out of phase Movements or end of Fight Phase movements. I’ve had great luck with this list in the past and am happy to play it again.
Win Condition: This one is tough because the Nightbringer is such a wild card. For CSM to win, they will need to take down the Nightbringer before the Necrons can bring down their Vindicators. If not, this game will get infinitely more difficult to win.
They’ll also need to focus on bleeding Necrons of CP to avoid any Fight Phase uses of Counter Offensive. A Nekrosor Heroic Intervention into Fights First, followed by a Counter Offensive later in the turn would be soul crushing for a CSM army that really wants to setup a big “go turn”.
What I Want to Work On This Game: I want to improve my usage of the Opportunistic Raiders stratagem. I played it incorrectly last game and need to fix that. I want to get it right this game and use it to take the Skorpekhs out early and then jump back into transports or cover if the Necrons are able to force tempo and trade type of game with a lot of shooting.
| Category | Description |
| Warlord | Abaddon the Despoiler |
| Leader / Bodyguard Combos | Fabius Bile with 10 Chosen |
| Chaos Lord with 5 Chosen | |
| Abaddon with 5 Chosen | |
| Transport / Unit Combinations: | Fabius Bile + 10 Chosen in a Rhino 2 |
| Chaos Lord + 5 Chosen in a Rhino 1 | |
| Legionaries in Rhino 1 | |
| Strategic Reserves: | Warp Talons |
| Key Stratagems: | Opportunistic Raiders – Used at the end of the Fight Phase to allow one unit from your army that was eligible to Fight and is not in Engagement Range of an enemy unit to make a Normal Move of 6 inches (12 if it is Mounted). If the unit is in Engagement Range of an Enemy Unit, it can make a Fall Back Move instead. Note: It cannot embark in a Transport if it disembarked from a Transport this turn. |
| Ruinous Raid – Used in your Shooting or Fight Phase to give one unit that disembarked from a Transport re-rolls to Hit and Wound as long as it is targeting an enemy unit on an Objective. | |
| Unfailingly Obdurate – Used in your opponent’s Shooting or Fight Phase to worsen the Armour Penetration on incoming attacks against one unit. | |
| Reaver’s Haste – Used in your Charge Phase to give an Infantry or Mounted unit Advance & Charge and, if the Charge target is on an Objective, +1 to Charge rolls. | |
| Warpcharged Engines – Used in your Movement Phase to give one Transport or Mounted unit flat 6 to its Advance. | |
| Key Combos | Lord Discordant on Helstalker + Mark of the Hound enhancement + Reaver’s Haste stratagem AND/OR Warpcharged Engines stratagem It’s very niche, but this is used to give the Lord Disco a 6 inch Scout Move to go with its 14 inch Normal Move. Add in the potential for a flat 6 inch Advance and/or Advance & Charge with potential for +1 to Charge and this guy flies across the board. I’ve used multiple times for one heck of an Alpha Strike. |
| Chosen + Ruinous Raid stratagem It’s not complex, but it does really amp up your Chosen and can be used to Advance out of a Rhino to blow up something on an Objective. This stacks really well with the Lord’s unit as it gives him the ability to fish for Devastating Wounds in melee, especially during his Chance For Glory “Go Mode”. |
ROUND-BY-ROUND RECAP:
The game starts with CSM winning the roll off and choosing to have the Necrons deploy first, as they really want to avoid giving the Lokhust Heavy Destroyers easy shots on the Vindicators.
The Necrons deploy the Nightbringer dead center first as a way of dictating the rest of the deployment to CSM. From there, they are able to deploy their Lokhust Heavy Destroyers (LHD’s) with Gauss Destructors and the majority of their Skorpekhs plus Nekrosor to threaten where the C’Tan dictates that the Vindicators have to go to get shots on it. They then place the other LHD’s (with Enmitic Exterminators) and Skorpekhs on the other side to threaten the CSM Natural Expansion Objective.
CSM deploys very conservatively and focuses on hiding as many units as possible, especially the Vindicators and Abaddon’s unit. Their goal is to get their Rhinos and infantry out into the middle and onto their Natural Expansion Objective while trying to setup a “go turn” for the Vindicators to take on the Nightbringer before the LHD’s get them in range.
NOTE: I could not find a definitive ruling in the core rules about how terrain / vehicle movement limitations would apply to the Vindicators that I deployed around Objective 1. The best that I could tell is that moving the Vindicators through the L-shaped gap in terrain near Objective 1 falls under the category of “well….the rules don’t say I can’t, so….” since the core rules all talk about terrain / vehicle movement interactions in reference to “walls”. I also found the below article on Goonhammer that supported that interpretation and so ruled it that way for this game. The obvious caveat here is that if that interpretation is incorrect that this entire game would need to be replayed and that I tried to get ahead of it by making that interpretation before deployment started so that neither side was surprised mid-game.
https://www.goonhammer.com/40k-start-competing-gw-terrain-layout-1/

CSM then wins the roll off to go first and makes their Scout move. The board state at the start of the battle is below.

Board State: Start of the Battle
ROUND 1:
| Phase: | Go First: CSM |
| Score at Start | 10 |
| Command | -Draw Assassination and Sabotage for Secondaries -Cultists sticky Objective 2 -Abaddon chooses 4+ Invulnerable Save aura ability |
| Movement | -Rhino 2 Advances to Objective 5 -Lord Disco moves into terrain to Sabotage |
| Shooting | -Lord Disco Sabotages in the midfield |
| Charge | -None |
| Fight | -None |
| End of Turn | -Score 0 on Secondaries -Drop Assassination for 1 CP -Necrons use Tunneling Horrors ability to pickup Ophydians 1 |
| Score at End | 10 |
Quiet first turn for CSM as they focus mostly on positioning and waiting for the Necrons to “come out to play”. The Sabotage should be safe, which will get points on the board, but Rhino 2 may end up being a sacrifice. The board state in the middle of Round 1 is shown below.

Board State: Middle of Round 1
| Phase: | Go Second: Necrons |
| Score at Start | 10 |
| Command | -Draw Secure No Man’s Land and Marked For Death for Secondaries -CSM mark both Vindicators and Abaddon + Chosen -Necrons mark Rhino 2 |
| Movement | -Nightbringer moves to shoot Rhino 2 -Skorpekhs 2, min sized unit, move to Objective 3 -Lokhust Lord + LHD’s move to gain Line of Sight to Objective 3 -Skorpekhs 3, max sized unit, stage in terrain -Nekrosor stages near both LHD’s -Ophydians 1 Deep Strike onto Objective 4 |
| Shooting | -LHD’s 1 does 2 Damage into Rhino 2 -Nightbringer kills Rhino 2 for 2 VP -Legionaries take 1 Mortal Wound disembarking |
| Charge | -None |
| Fight | -None |
| End of Turn | -Score 7 on Secondaries -CSM scores 3 on Secondaries |
| Score at End | 17 |
Another somewhat uneventful turn. This time it’s the Necrons who do mostly staging and only kill a Rhino. The Nightbringer is a bit exposed to shooting, but that could be bait for CSM to commit their Vindicators. The board state at the end of Round 1 is below.

Board State: End of Round 1
ROUND 2:
| Phase: | Go First: CSM |
| Score at Start | 13 |
| Command | -Draw Area Denial and Recover Assets for Secondaries -Abaddon picks hit re-roll aura ability -Score 10 on Primary |
| Movement | -Lord Disco moves to Objective 4 -Vindicators 1 and 2 Advance out to Shoot the Nightbringer -Abaddon + Chosen move up to buff the Vindicators -Bikers Advance to Move Block in front of Objective 5 -Lord + Chosen move behind terrain to stage -Rhino 1 positions behind terrain to stage |
| Shooting | -Rhino 1 and Cultists Recover Assets for 3 VP -Vindicator 1 Dark Pacts for Sustained and does 3 Damage to Nightbringer and 2 to Ophydians 1 -Vindicator 2 Dark Pacts for Sustained and uses a CP re-roll on the number of shots to do 3 Damage to the Nightbringer -Bikers Dark Pact for Lethal and do 1 Damage to Nightbringer -Legionaries Dark pact for Sustained and do 3 Damage to Nightbringer with Lascannon -Abaddon + Chosen kill 1 model in Ophydians 1 -Lord Disco kills Ophydians 1 |
| Charge | -Lord Disco into Nightbringer -Bikers into Nightbringer |
| Fight | -Lord Disco uses Dark Pacts, but fails and takes 2 Mortal Wounds, for Sustained and does 3 Damage to Nightbringer -Nightbringer uses Counter Offensive and kills only 1 Biker (rolled five 1’s to Hit or Wound) -Bikers Dark Pact for Lethal and Nightbringer tanks all attacks |
| End of Turn | -Lord Disco uses Opportunistic Raiders stratagem to Fall Back from Nightbringer -Nightbringer uses Drain Life ability to kill another Biker model -Score 8 on Secondaries |
| Score at End | 31 |
Well that turn felt bad. CSM set up a mini “go turn” and the Vindicators handed the Nightbringer 13 Invulnerable Saves only to watch as he made 9 of them. He then proceeded to make close to half of his 5+ Feel No Pains for anything that did sneak through. It was balanced out a bit by how hard he whiffed in combat with the Bikers, but still…..activating most of your army into one unit and for it to survive does not feel great. Also, the Vindicators and Lord Disco are now completely exposed and about to get lit up by the Necrons. Board state in the middle of Round 2 is below.

Board State: Middle of Round 2
| Phase: | Go Second: Necrons |
| Score at Start | 17 |
| Command | -Draw No Prisoners and A Tempting Target for Secondaries -CSM choose Objective 5 as Tempting Target -Pass all Battle Shock -Score 10 on Primary -Reanimate 1 Wound on Nightbringer |
| Movement | -Skorpekh Lord + Skorpekhs 1 move to Charge Bikers -Skorpekhs 2 Advance to Charge Abaddon + Chosen -Chronomancer + LHD’s move onto Objective 3 -Nekrosor moves to buff both LHD’s units -Skorpekhs 3 stage behind terrain in the midfield -LHD’s 1 (with Enmitic Exterminators) move into Rapid Fire Range of Legionaires -Warp Talons Rapid Ingress into the Necrons DZ |
| Shooting | -LHD’s 1 kill 2 models in Legionaries -Skorpekh Lord whiffs into Legionaries – Chronomancer + LHD’s do 6 Damage to Vindicator 1 through Unfailingly Obdurate stratagem -Chronomancer + LHD’s use Chronometron ability to move back 5 inches into terrain but still on Objective 3 -Lokhust Lord + LHD’s do 24 Damage into Vindicator 1 and kill it for 2 VP -Vindicator 1 explodes and does 2 Mortal Wounds to Abaddon + Chosen, 3 Mortal Wounds to Lord Disco, and 3 Mortal Wounds to Vindicator 2 -Nightbringer into Lord Disco who tanks it |
| Charge | -Skorpekh Lord + Skorpekhs into Biker -Skorpekh Lord uses Crimson Harvest ability and kills the last Biker with 3 Mortal Wounds for 2 VP -Nightbringer, now out of Engagement Range, Charges into Lord Disco -Skorpekhs 2 use Driven to Butchery stratagem to Charge into Abaddon + Chosen |
| Fight | -Skorpekhs 2 kill 3 models in Abaddon + Chosen -Nightbringer kills Lord Disco for 1 VP -Skorpekh Lord + Skorpekhs Consolidate onto Objective 5, as they were eligible to Fight thanks to Charging -Abaddon uses Dark Pacts for Sustained and solo’s Skorpekhs 2 -Abaddon gains a CP thanks to Dark Destiny ability |
| End of Turn | -Score 10 on Secondaries |
| Score at End | 37 |
Well that was brutal. Worst part is that it actually should have been way worse. Lokhust Lord + LHD’s should have split fired into both Vindicators thanks to having access to Sustained, from Nekrosor, and Lethal on 5+ Critical Hits, from the Lokhust Lord. Despite that mistake, CSM is in big trouble now and has lost a lot of resources in the early game. Let’s see if they can hang in there or if this game becomes a blow out. Board state at the end of Round 2 is below.

Board State: End of Round 2
ROUND 3:
| Phase: | Go First: CSM |
| Score at Start | 31 |
| Command | -Draw Overwhelming Force and Engage On All Fronts for Secondaries -Abaddon chooses hit re-roll aura ability -Score 5 on Primary |
| Movement | -Abaddon + Chosen Advance to Charge Nightbringer -Lord + Chosen move to Charge Skorpekh Lord + Skorpekhs -Legionaires move to Charge Skorpekh Lord + Skorpekhs -Warp Talons position to Charge into Lokhust Lord + LHD’s without getting into Heroic Intervention range of Nekrosor -Rhino 1 moves onto Objective 5 -Necrons Rapid Ingress Lokhust Destroyers into the CSM DZ |
| Shooting | -Abaddon + Chosen do 2 Damage to Nightbringer -Lord + Chosen use Lord of Chaos ability to Grenade Skorpekh Lord + Skorpekhs for 0 CP and do 4 Mortal Wounds -Lord + Chosen uses Dark Pacts for Sustained to kill 1 more model in Skorpekh Lord + Skorpekhs -Rhino 1 uses Dark Pacts for Sustained and Firing Deck to let Bile shoot out and he kills the Skorpekhs with the Lord for 3 VP -Legionaries use Dark Pacts for Lethals to do 2 Damage to Skorpekh Lord -Vindicator 2 uses Dark Pacts for Sustained to pop off and kill Chronomancer + LHD’s for 2 VP |
| Charge | -Abaddon + Chosen into Nightbringer -Lord + Chosen into Skorpekh Lord -Legionaires into Skorpekh Lord -Warp Talons into Lokhust Lord + LHD’s |
| Fight | -Abaddon uses Dark Pacts for Sustained and pops off to do 18 Damage to Nightbringer -Skorpekh Lord uses Counter Offensive stratagem and kills 2 Chosen -Lord uses Chance for Glory ability and Dark Pacts for Sustained to activate “go mode” and kills Skorpekh Lord -Warp Talons use Dark Pacts for Sustained and kill 2 LHD’s -Lokhust Lord + LHD’s kill 1 model in Warp Talons -Lokhust Lord uses Resurrection Orb to bring back 1 LHD |
| End of Turn | -Score 7 on Secondaries -Lord + Chosen use Opportunistic Raiders stratagem to move back behind terrain -Necrons use Tunneling Horrors ability to pickup Ophydians 2 |
| Score at End | 43 |
So…..I guess the dice gods decided to compensate CSM for how badly their Round 2 turn went by letting them roll like crazy in Round 3. The Vindicator 2 absolutely went off into the Chronomancer + LHD’s, Abaddon rolled 4 Sustained Hits into 5 Devastating Wounds (plus 2 additional failed saves), and the Lord did 3 Devastating Wounds into the Skorpkh Lord. Necrons are still probably going to punish CSM next turn and I am questioning whether or not attacking the Lokhust Lord + LHD’s instead of Objective 2 with the Warp Talons was the right move. The thought was to shut down the LHD’s for a turn or two as they don’t have any “Fall Back and….” abilities or stratagems. All that said, at least it’s still a game and CSM isn’t getting blown off the board. Board state in the middle of Round 3 is below.

Board State: Middle of Round 3
| Phase: | Go Second: Necrons |
| Score at Start | 37 |
| Command | -Draw Engage On All Fronts and Extend Battle Lines for Secondaries -Score 5 on Primary -Reanimate 3 on Lokhust Lord + LHD’s |
| Movement | -Lokhust Lord + LHD’s Fall Back onto Objective 3 -Nekrosor to Charge into Warp Talons -Skorpekhs 3 Advance onto Objective 4 -Lokhust Destroyers move to Shoot Vindicator 2 -Ophydians 2 Deep Strike into CSM DZ near Objective 5 |
| Shooting | -LHD’s 1 kill Legionaries -Nekrosor kills 2 in Warp Talons -Lokhust Destroyers use Methodical Murder stratagem for Sustained and Lethal but cannot move in a way that makes the Vindicator 2 the closest eligible target, so no re-rolls -Vindicator 2 uses Unfailingly Obdurate stratagem and Benefits of Cover to tank all attacks |
| Charge | -Nekrosor into Warp Talons -Skorpekhs 3 use Driven to Butchery stratagem to Charge Abaddon + Chosen -Lokhust Destroyers into Cultists |
| Fight | -Skorpekhs use Plasmacyte wargear and Methodical Murder stratagem to kill Abaddon + Chosen -Nekrosor kills Warp Talons -Lokhust Destroyers kill 9 Cultists and Consolidate onto Objective 1 |
| End of Turn | -Score 8 on Secondaries |
| Score at End | 50 |
This game is absolutely lethal. Necrons were feeling great about that turn, despite the Vindicator 2 tanking all incoming attacks, until they remembered that Bile + 10 Chosen have been patiently waiting in Rhino 1 all game long. Now those Skorpekhs in the middle are looking like a real juicy target. Its looking like this one will be a blood bath (or whatever Necrons have-bath) to the end. Board state at the end of Round 3 is below.

Board State: End of Round 3
ROUND 4:
| Phase: | Go First: CSM |
| Score at Start | 43 |
| Command | -Draw Secure No Man’s Land and Storm Hostile Objective for Secondaries -Cultists fail Battle Shock -Score 5 on Primary |
| Movement | -Lord + Chosen Advance to Charge LHD’s 1 -Bile + Chosen disembark and Advance to Charge Skorpekhs 3 on Objective 4 -Rhino 1 positions on the edge of Objective 5 to try to Move Block the Ophydians 2 -Cultists back up -Vindicator 2 Advances backwards into the safety of the CSM DZ |
| Shooting | -Vindicator 2 kills 5 of 6 models in Lokhust Destroyers -Lord + Chosen use Dark Pacts for Sustained and do 3 Damage into LHD’s 1 -Bile + Chosen use Dark Pacts for Sustained and kill 1 Skorpekh -Rhino 1 uses Dark Pacts for Lethal and kills 1 model in LHD’s 1 |
| Charge | -Bile + Chosen into Skorpekhs 3 -Lord + Chosen into LHD’s 1 -Vindicator 2 fails into Lokhust Destroyers |
| Fight | -Bile + Chosen use Ruinous Raid stratagem and Dark Pacts for Lethals to kill Skorpekhs 3 through Image of Death stratagem -Lord + Chosen use Dark Pacts for Sustained to take LHD’s 1 down to 1 Wound remaining -LHD’s 1 do 1 Damage to Lord + Chosen |
| End of Turn | -Score 9 on Secondaries |
| Score at End | 57 |
Oof. This game has started to flip and now it’s all about if the Necrons can hang on long enough. They do control enough Objectives and still have decent killing power, but CSM holds the advantage in mobility and has lethality that is better matched to the remaining targets. This one will be interesting. Board state in the middle of Round 4 is below.

Board State: Middle of Round 4
| Phase: | Go Second: Necrons |
| Score at Start | 50 |
| Command | -Draw Assassination and Storm Hostile Objective for Secondaries -Lokust Destroyers fail Battle Shock -Score 10 on Primary -Reanimate 2 on Lokhust Destroyers, 2 on LHD’s 1, and Lokhust Lord + LKHD’s to full |
| Movement | -Ophydians 2 Advance to get close to Objective 5 -LHD’s 1 Fall Back from Lord + Chosen -Lokhust Lord + LHD’s position inside terrain but also on Objective 3 -Nekrosor moves up next to Lokhust Lord + LHD’s -Hexmark moves up to Shoot into Lord + Chosen |
| Shooting | -Lokhust Destroyers into Vindicator 2, who tanks all attacks AGAIN with Unfailingly Obdurate stratagem -Hexmark into Lord + Chosen, who tank all attacks by rolling three 5’s |
| Charge | -Ophydians 2 use Driven to Butchery stratagem to Charge Rhino 2 and roll high enough to get 2 models onto Objective 5 -Lokhust Destroyers into Cultists |
| Fight | -Ophydians 2 use Plasmacyte wargear and Methodical Murder stratagem to do 4 Damage to Rhino 1 -Lokhust Destroyers kill Cultists -Rhino 1 use Dark Pacts for Lethal to do 2 Damage |
| End of Turn | -Score 4 on Secondaries -Drop Assassination for 1 CP |
| Score at End | 64 |
This is still close and it will come down to last round Secondary draws, but I think Necrons may have it. Let’s see if CSM can close the gap with a big final turn. Board state at the end of Round 4 is below.

Board State: End of Round 4
ROUND 5:
| Phase: | Go First: CSM |
| Score at Start | 57 |
| Command | -Draw Cleanse and Extend Battle Lines for Secondaries -Use Insane Bravery stratagem on Vindicator 2 -Rhino 1 uses Self Repair ability to regain 1 Wound -Score 10 for Primary |
| Movement | -Lord + Chosen Advance onto Objective 2 -Hexmark Overwatches and does 1 Damage as he low rolls again |
| Shooting | -Rhino 1 whiffs into Ophydians -Lord + Chosen Dark Pact for Sustained and do 2 Damage into Hexmark -Vindicator 2 kills Lokhust Destroyers -Bile + Chosen Cleanse for 2 VP |
| Charge | -Lord + Chosen Multi-Charge into Hexmark and LHD’s 1 |
| Fight | -Lord + Chosen Dark Pact for Sustained and kill Hexmark and LHD’s 1 -Ophydians 2 whiff -Rhino 1 whiffs |
| End of Turn | -Score 7 on Secondaries |
| Score at End | 74 |
CSM’s score is now capped at 74. I think Necrons can surpass that, but it will be close and will depend on secondaries. Either way, great job staying in the game by CSM despite a ROUGH Round 2. Board state in the middle of Round 5 is below.

Board State: Middle of Round 5
| Phase: | Go Second: Necrons |
| Score at Start | 64 |
| Command | -Draw Cleanse and Recover Assets for Secondaries -Drop Cleanse for Overwhelming Force -Reanimate Ophydians 2 to full |
| Movement | -Nekrosor to Necrons DZ |
| Shooting | -Nekrosor and Lokhust Lord + LHD’s Recover Assets for 3 VP |
| Charge | -None |
| Fight | -Ophydians 2 uses Methodical Murder stratagem to do 2 Damage to Rhino 1 through Unfailingly Obdurate stratagem -Rhino 1 whiffs |
| End of Turn | -Score 3 on Secondaries -Score 10 on Primary |
| Score at End | 77 |
Final score for the game is 77-73 for the Necrons. Board state in the end of Round 5 is below.

Board State: End of Round 5
RESULT:
Singles Format: 77 – 73 Necrons WIN
WTC Teams Format: 10 – 10 DRAW
GAME REVIEW:
Dang that was a wild game. CSM was feeling really bad by the end of Round 2 but rebounded nicely to stay in the game and almost win it. This kind of makes sense because Renegade Raiders is one of the detachments that I have the most experience with, but it still good to see one of your favorite factions avoid a blow out. That said, there was definitely some luck with dice and secondary draws that contributed to CSM staying in the game.
From a Necrons perspective, this detachment is super fun. Its not as melee heavy as I first thought and actually seems to want to play more of a shooting game with the Skorpekhs being in the list to score points and keep the opponents away from the Necrons’ gun line. It also has a real serious AP into 2+ Saves with Armour of Contempt and lack of Fall Back and Shoot problem that will be tough to overcome against certain armies (looking at you, Ultramarines). I am happy with how it went for my first game with the list and detachment and definitely look forward to trying it again.
WHAT I WOULD CHANGE NEXT TIME:
- CSM
- The biggest second guess that I have is choosing to Cleanse vs Advance and Charge with Bile’s Chosen unit in Round 5. At the time I was worried that I would lose points on Cleanse and Extend Battle Lines if I couldn’t kill the units on Objective 3 (and I don’t think I do since I couldn’t use the Ruinous Raid stratagem to buff the unit up). I still think I made the right call, but do have quite a bit of “what if….” thoughts on how I could have spiked my damage and won the game. I also just don’t like when I have to choose actions over violence.
- Necrons
- This was a good first attempt but I want to play the Nekrosor better next game. He was OK in this game and definitely buffed up the LHD’s to crazy amounts, but CSM played around him for most of the game. I think I want him in the mix a bit more next time.
EARNED THEMSELF A NAME:
The CSM Unfailingly Obdurate stratagem. In Rounds 3 through 5, that stratagem saved CSM and almost singlehandedly kept them in the game (it definitely kept the Vindicator 2 in the game).
MAGNUS OF THE GAME:
Lokhust Destroyers. Boy did Unfailingly Obdurate and Benefits of Cover neuter them. I think I am going to swap to starting them on the board next time and potentially put LHD’s 1, who also struggled with a lack of AP, or Skorpekhs 2 into Reserves next time

Leave a Reply